Axon Image Flashing Guide
This document provides instructions for flashing OS images to supported storage devices for Axon.
Supported Boot Devices
USB Drive
NVMe SSD
SD Card
eMMC
Flashing Images to Storage Devices
Warning
Ensure the correct device path (e.g., /dev/sdX, /dev/nvme0n1) is used to avoid overwriting important data.
Note
Raw image can be used on SD Card, NVMe, and USB Storage Media devices.
Uncompressing the Image
tar -xvf <download_image.tar.gz>
Identifying the Correct Device for Flashing
To determine the correct device path for flashing, use the lsblk command to list available block devices:
lsblk
Example output:
NAME        MAJ:MIN RM  SIZE RO TYPE MOUNTPOINT
sda           8:0    1  32G  0 disk
└─sda1        8:1    1  32G  0 part /media/usb
nvme0n1     259:0    0 512G  0 disk
└─nvme0n1p1 259:1    0 512G  0 part /mnt/nvme
mmcblk0     179:0    0  64G  0 disk
└─mmcblk0p1 179:1    0  64G  0 part /mnt/emmc
mmcblk1     179:0    0  64G  0 disk
└─mmcblk1p1 179:1    0  64G  0 part /mnt/emmc
Note:
nvme0n1: Represents an NVMe SSD, use /dev/nvme0n1 for flashing.
sda: Typically a USB-attached storage device, use /dev/sda for flashing.
mmcblk0: Represents the eMMC on Axon boards, use /dev/mmcblk0 for flashing.
mmcblk1: Represents the SD card on Axon boards, use /dev/mmcblk1 for flashing.
Warning
Always verify the device path (e.g., /dev/nvme0n1, /dev/sda, /dev/mmcblk0, or /dev/mmcblk1) using the lsblk output to avoid overwriting critical data. Ensure the device is not mounted before flashing.
Flashing to eMMC
Refer to the detailed guide:
eMMC Flashing Guide (Vicharak Docs)
Flashing with dd
sudo dd if=<image-name> of=/dev/<device> status=progress; sync
Verifying the Flash (for dd method)
After flashing with dd, verify the image:
sudo fdisk -l /dev/<device>
Example output:
Device          Start     End     Sectors   Size Type
/dev/<device>1   16384    24575     8192     4M  Linux filesystem
/dev/<device>2   24576    32767     8192     4M  Linux filesystem
/dev/<device>3   32768  1081343  1048576   512M  Linux filesystem
/dev/<device>4 1081344  1671167   589824   288M  Linux filesystem
/dev/<device>5 1671168  2195455   524288   256M  Linux filesystem
/dev/<device>6 2195456 13420510 11225055   5.4G  Linux filesystem
Check Root Filesystem with fsck
The root partition is typically the 6th partition (e.g., /dev/sdX6 or /dev/nvme0n1p6).
sudo fsck -f /dev/<device>6
Example output:
fsck from util-linux 2.37
e2fsck 1.46.2 (28-Feb-2021)
/dev/sdb6: clean, 12345/456789 files, 78901/7890123 blocks
Warning
If fsck reports serious errors or can’t read the partition, recheck your dd command or reflash the image.
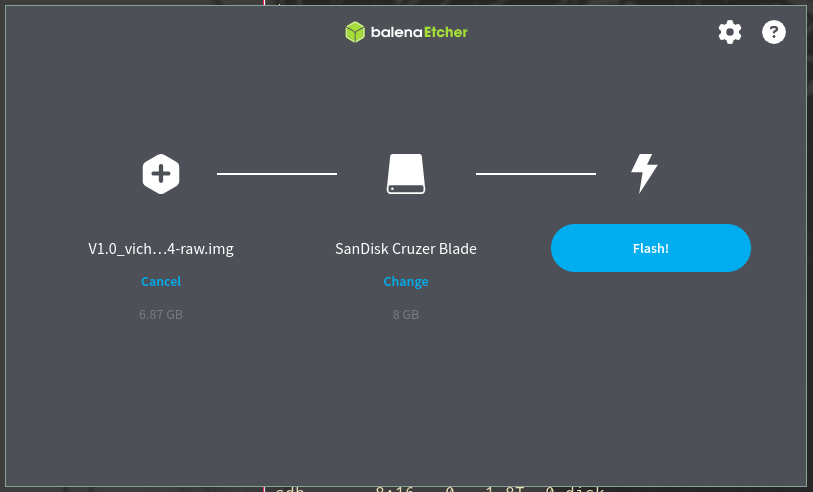
Flashing with Balena Etcher
Download and install Balena Etcher.
Select the downloaded image file (
<image-name>).Choose the target device (e.g.,
/dev/sdXfor SD Card or USB,/dev/nvme0n1for NVMe).Click Flash and wait for the process to complete. Balena Etcher automatically verifies the flash.