MIPI Camera Interface
Hardware Required
Camera ( OV5647 or any other RPI supported camera)
Vicharak Flex Cable 30 Pin 0.4mm Pitch Cable (Golden Color)
Vicharak Camera PCB
FPC50 15 Pin 1mm Pitch Cable
Steps to follow
Connect the hardware
Configure the overlays
Run Camera
Pre-Requisites
You must update the kernel using the command below.
sudo apt update
sudo apt upgrade
Install ffmpeg and v4l2 tools
sudo apt install ffmpeg
sudo apt install v4l-utils
Ensure your axon is powred off before connecting the camera
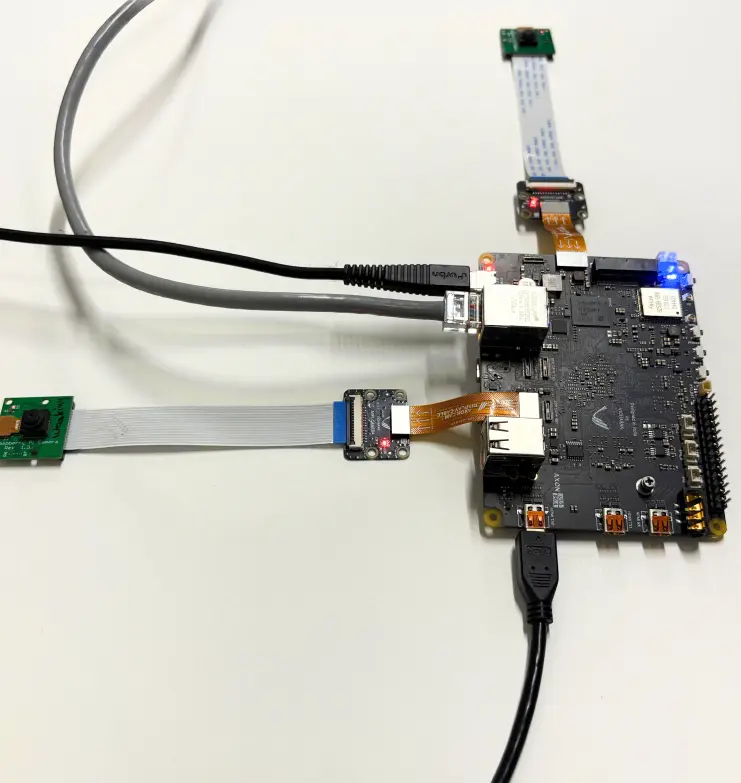
How to Attach Camera to Axon
First, Connect Vicharak Flex Cable To Vicharak CAM PCB Connector.
Danger
Make sure to connect the Vicharak flex cable’s AXON PCB side connector to the AXON board, and the display/camera side connector to the Vicharak CAM PCB.
Attach Camera Module To FPC50 15 Pin 1mm Pitch Cable.
Connect Camera To Vicharak CAM PCB Connector.
Connect Axon Side Vicharak Flex Cable to Axon.
Note
Note down the pin names where yor are connecting the camera. Accordingly overlay needs to be selected.
After Using Camera, User can remove camera using twizer.
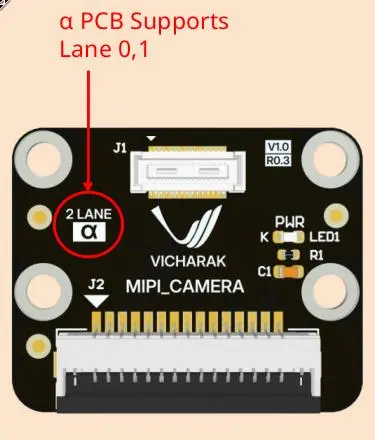
Camera Interface PCBs
2 Lane Alpha PCB ( Rpi compatible )
Verify Camera Connection and Detection:
Open a terminal by clicking ctrl+alt+t
Install v4l2 tools
sudo apt install v4l-utils
Check if the camera device is detected:
v4l2-ctl --list-devices
You should see output listing all the camera devices and sensors (look for rkisp_mainpath):
rkisp_mainpath (platform:rkisp0-vir0):
    /dev/video22
    /dev/video23
    /dev/video24
    /dev/video25
    /dev/video26
    /dev/video27
    /dev/video28
    /dev/media2

rkisp_mainpath (platform:rkisp1-vir0):
    /dev/video31
    /dev/video32
    /dev/video33
    /dev/video34
    /dev/video35
    /dev/video36
    /dev/video37
    /dev/media3
Note
Here, the first device below rkisp_mainpath that is /dev/video22 and /dev/video31 are your camera devices. Similarly, your cameras will be listed here, note down the device name like video22 and video31.
If you got the device name and number then it confirms that axon has detected the Camera. If it is not visible, check the connection and pins again.
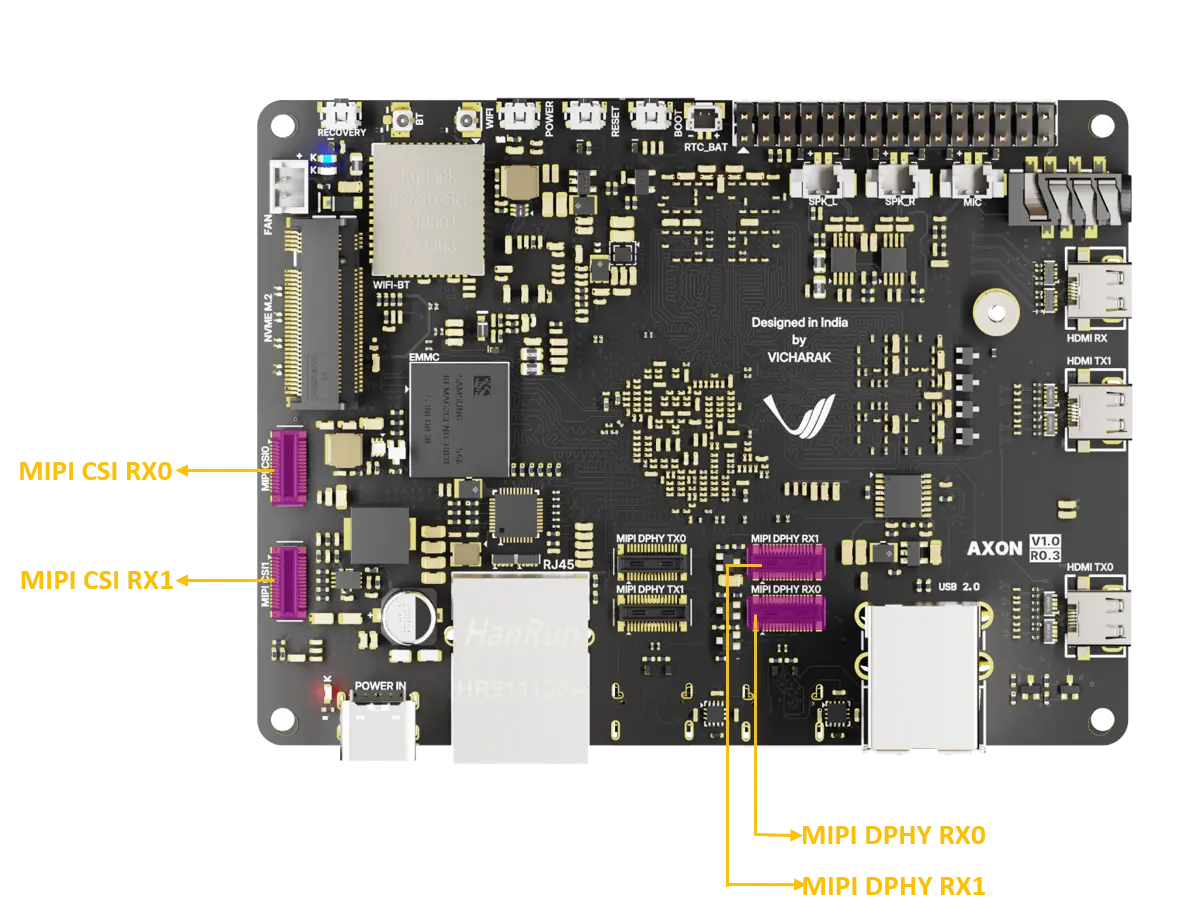
Enable Overlays In Axon
Here, you can find which overlay should be turned on for each MIPI Connector.
Interface on Vicharak board |
Lane option |
Vicharak camera PCB |
Turn on Overlay in Linux |
|---|---|---|---|
MIPI CSI0 |
2 Lane |
α |
Alpha |
MIPI CSI1 |
2 Lane |
α |
Alpha |
MIPI DPHY RX0 |
2 Lane |
α |
Alpha |
MIPI DPHY RX1 |
2 Lane |
α |
Alpha |
MIPI CSI0 MIPI CSI1 MIPI DPHY RX0 MIPI DPHY RX1 |
4 Lane |
α |
Alpha |
Note
Alpha 4 lane PCB will be available soon
Steps to follow for Configuration
Open a terminal window(
Ctrl+Alt+T).Run command
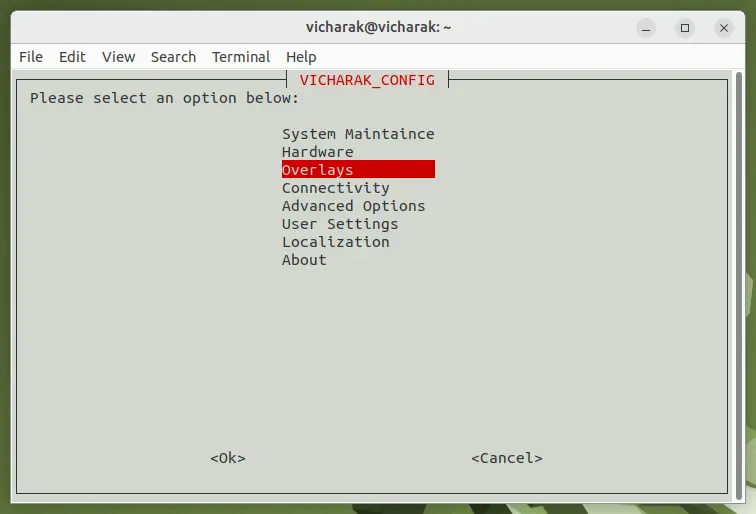
sudo vicharak-configin it.Select
Overlaysoptions in it by pressingenterkey.
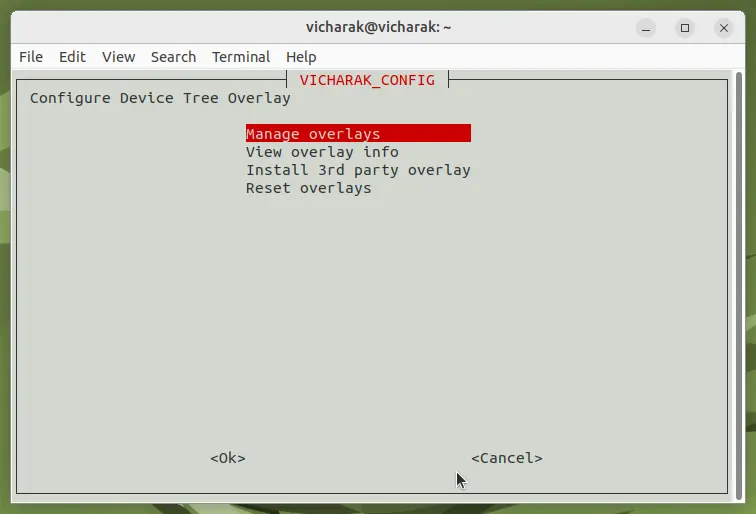
You will see Warning Page, click on
yesand selectManage Overlaysoptions.
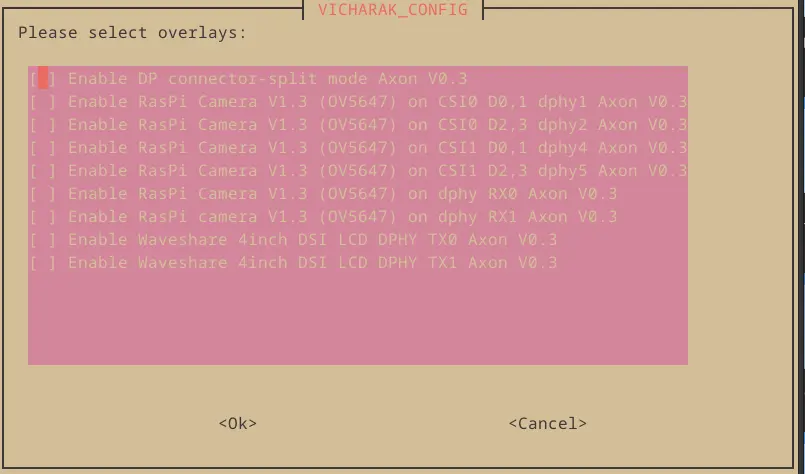
Select overlays as per your camera sensor
( OV5647 )and port to which it is connected( CSI0 )by pressingspacebaron keyboard, then selectOk.
Note
If you want to connect multiple cameras, check which Sensor your camera is using from your camera docs like OV5647 or IMX519 and the ports to which it is connected like CSI0/CSI1 or dphy RX0/RX1 on axon. Then select the overlay according to it.
To return back to terminal, press the
Esckey until you exit from it.In order to enable your configuration, Restart your computer or Run command
sudo rebootin terminal.
Danger
Make sure that whenever you are going to connect Camera, Device should be power off.
To use the camera(s):
Tip
Connect a monitor to axon to see the captured feed.
Run Camera Using qV4l2 (GUI tool)
Step 1: Install the GUI tool (qv4l2) on RX Axon
sudo apt install qv4l2
Step 2: Open qv4l2
qv4l2
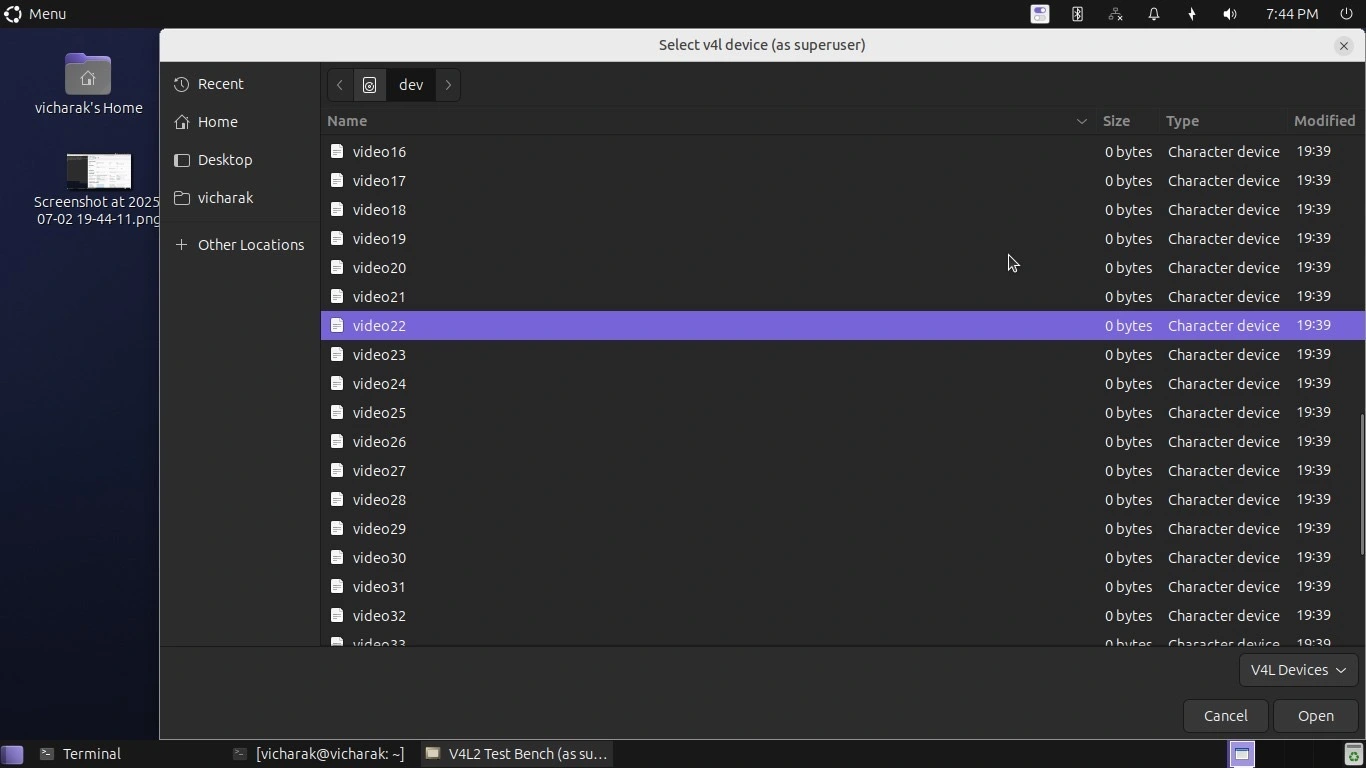
Step 3: Select your camera device
Click on Open Devices on top-left corner
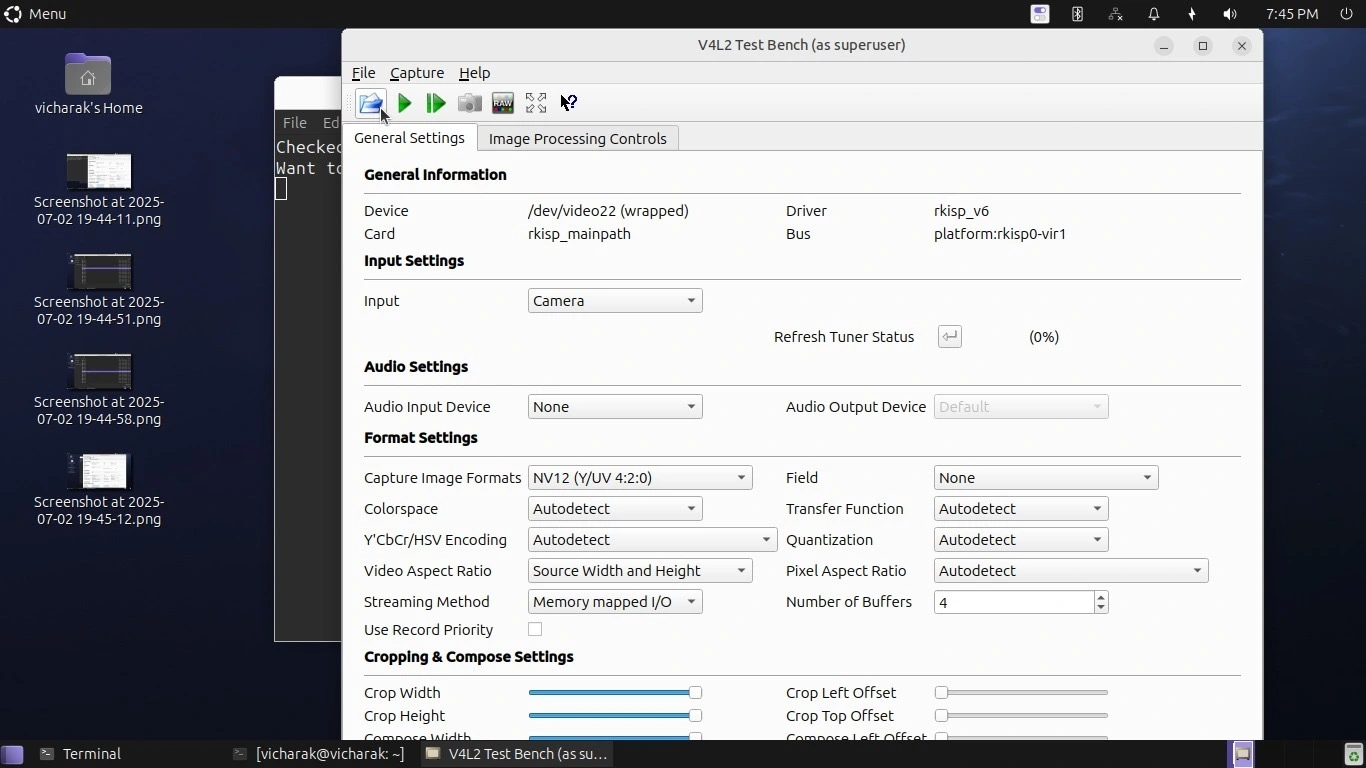
Select the device name from here like video22 or video31 from the menu (You can get device name by running
v4l2-ctl --list-devices)
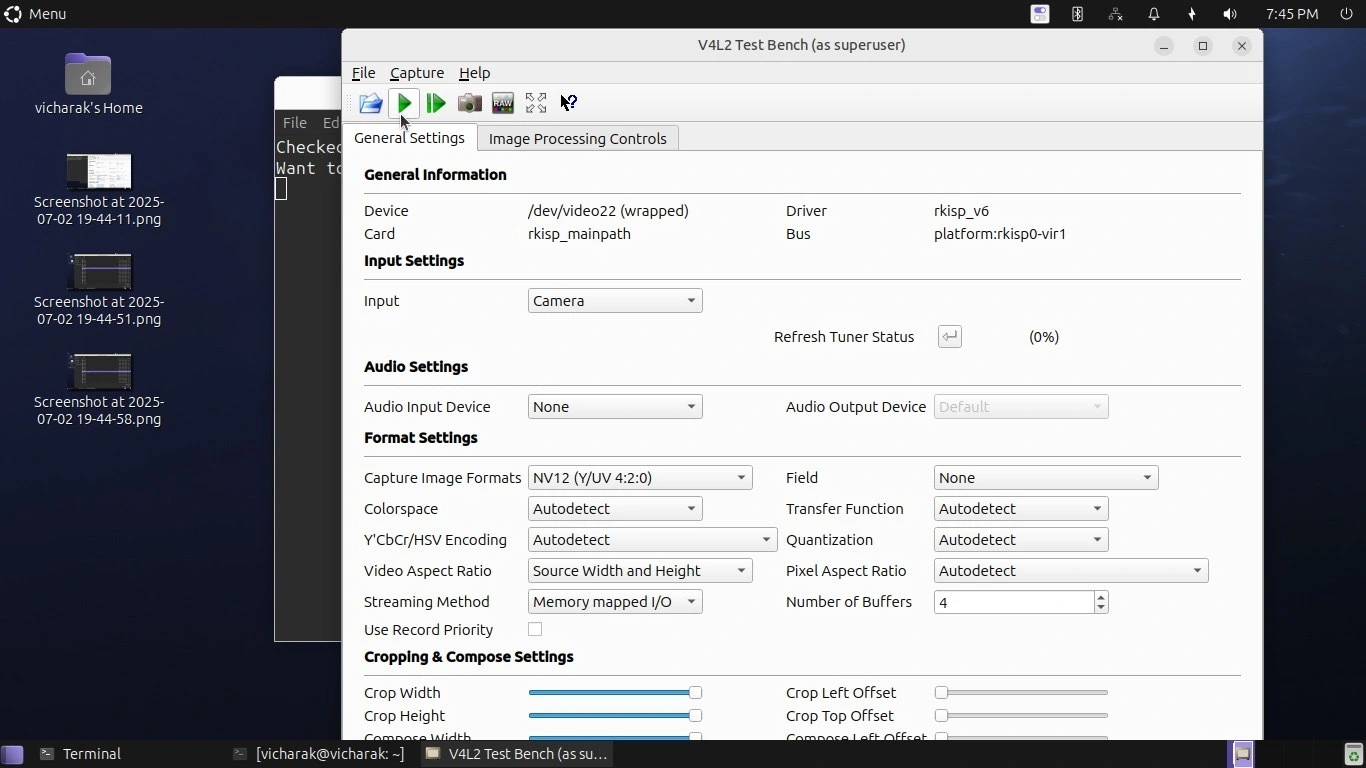
Step 4: Start the camera
Click on start capturing
Tip
If you have connected multiple camera devices to axon, open multiple qV4l2 windows in the same way and select different camera device name. Using this you can use all the MIPI ports.
Run camera live feed using ffmpeg
Install ffmpeg using
sudo apt install ffmpegFind the camera device number and substitute in the below command
Run
ffplay -f v4l2 -pixel_format nv12 -video_size 1920x1080 /dev/video<camera_device_number>In case of multiple camera open a new terminal and run the same command with different device number
Run Camera Using V4l2 Utility
Use v4l2-ctl to capture camera frame data
Note
At place of <camera_device_number> add your camera device name like 22 or 31
v4l2-ctl --verbose -d /dev/video<camera_device_number> \
--set-fmt-video=width=1920,height=1080,pixelformat=NV12 \
--stream-mmap=4 \
--stream-count=60 \
--set-selection=target=crop,flags=0,top=0,left=0,width=1920,height=1080 \
--stream-to=sample.yuv
Note
For Single Camera, Default Camera Number would be 11. As you can verfiy by below process.
You can get <camera_device> Number by running below command :
ls -l /dev/video*
or
v4l2-ctl –list-devices
=> /dev/video-camera0 -> video<camera_device> e.g. - 11, 31 etc.
Playing Captured File
ffplay -f rawvideo -pixel_format nv12 -video_size 1920x1080 -framerate 30 sample.yuv
Tip
For multiple cameras, first verify and find out the device number of the camera then open a new terminal & run the same command with new device number.
Run Camera Using Python Script
Note
The py script given below is for 1 camera,
Install Python if not already installed. You can download Python from the official website: Python Downloads.
for Debian-based systems (like Ubuntu):
sudo apt update
sudo apt install python3-pip
Install the OpenCV library using pip
for Debian-based systems (like Ubuntu):
pip install opencv-python
Setup
Open a terminal window(
Ctrl+Alt+T).To create a (
.py) file in vim editor, Run commandvim <file_name>.pyin terminal.Copy this below content into the file and paste it by pressing
Ctrl + Shift + v, then pressEscand to save this file, type:wq.
             # !/bin/env python3
             import cv2
             cap = cv2.VideoCapture(<camera_device_number>)
             while True:
                 ret, frame = cap.read()
                 cv2.imshow('frame', frame)
                 if cv2.waitKey(1) & 0xFF == ord('q'):
                     break
             # After the loop release the cap object
             cap.release()
             # Destroy all the windows
             cv2.destroyAllWindows()
Note
For Single Camera, Default Camera Number would be 11. As you can verfiy by below process.
You can get <camera_device> Number by running below command :
ls -l /dev/video*
=> /dev/video-camera0 -> video<camera_device> e.g. - 11, 31 etc.
Tip
For multiple cameras you just have to add more VideoCapture objects. Given below is a example of python script for 2 cameras.
         #!/bin/env python3
         import cv2
         cap0 = cv2.VideoCapture(<camera_device_number>)
         cap1 = cv2.VideoCapture(<camera_device_number>)
         while True:
             ret0, frame0 = cap0.read()
             ret1, frame1 = cap1.read()
             if ret0:
                 cv2.imshow("Camera 0", frame0)

             if ret1:
                 cv2.imshow("Camera 1", frame1)

             # Press q to quit
             if cv2.waitKey(1) & 0xFF == ord('q'):
                 break

         # Release cameras
         cap0.release()
         cap1.release()
         cv2.destroyAllWindows()
Open a terminal window(
Ctrl+Alt+T).Navigate to the directory where your Python program is located using the
cdcommand.Run Python program using the following command:
python3 <file_name>.py
If you have multiple versions of Python installed, ensure you use python3 to run the program for Python 3.x.
Troubleshooting
If you encounter any errors related to missing modules or libraries, ensure that Python and OpenCV are properly installed on your system.
If the camera frame does not open or the program does not behave as expected, check for any errors in the terminal output and review your program for potential issues.
Check Camera I2C address is detected or not.
Note
sudo i2cdetect -y <i2c_bus_number>
I2C Bus number is mentioned in Camera DTS node in device tree file