MIPI DSI

Axon provides a MIPI-DSI host controller and multiple DSI lanes; a display panel is driven by a DSI bridge/panel driver with appropriate timing, format, and polarity settings. In standard configurations, TX0 on RK3588 is used for direct or bridged DSI connections to Waveshare or compatible panels.
Getting Started
Prerequisites
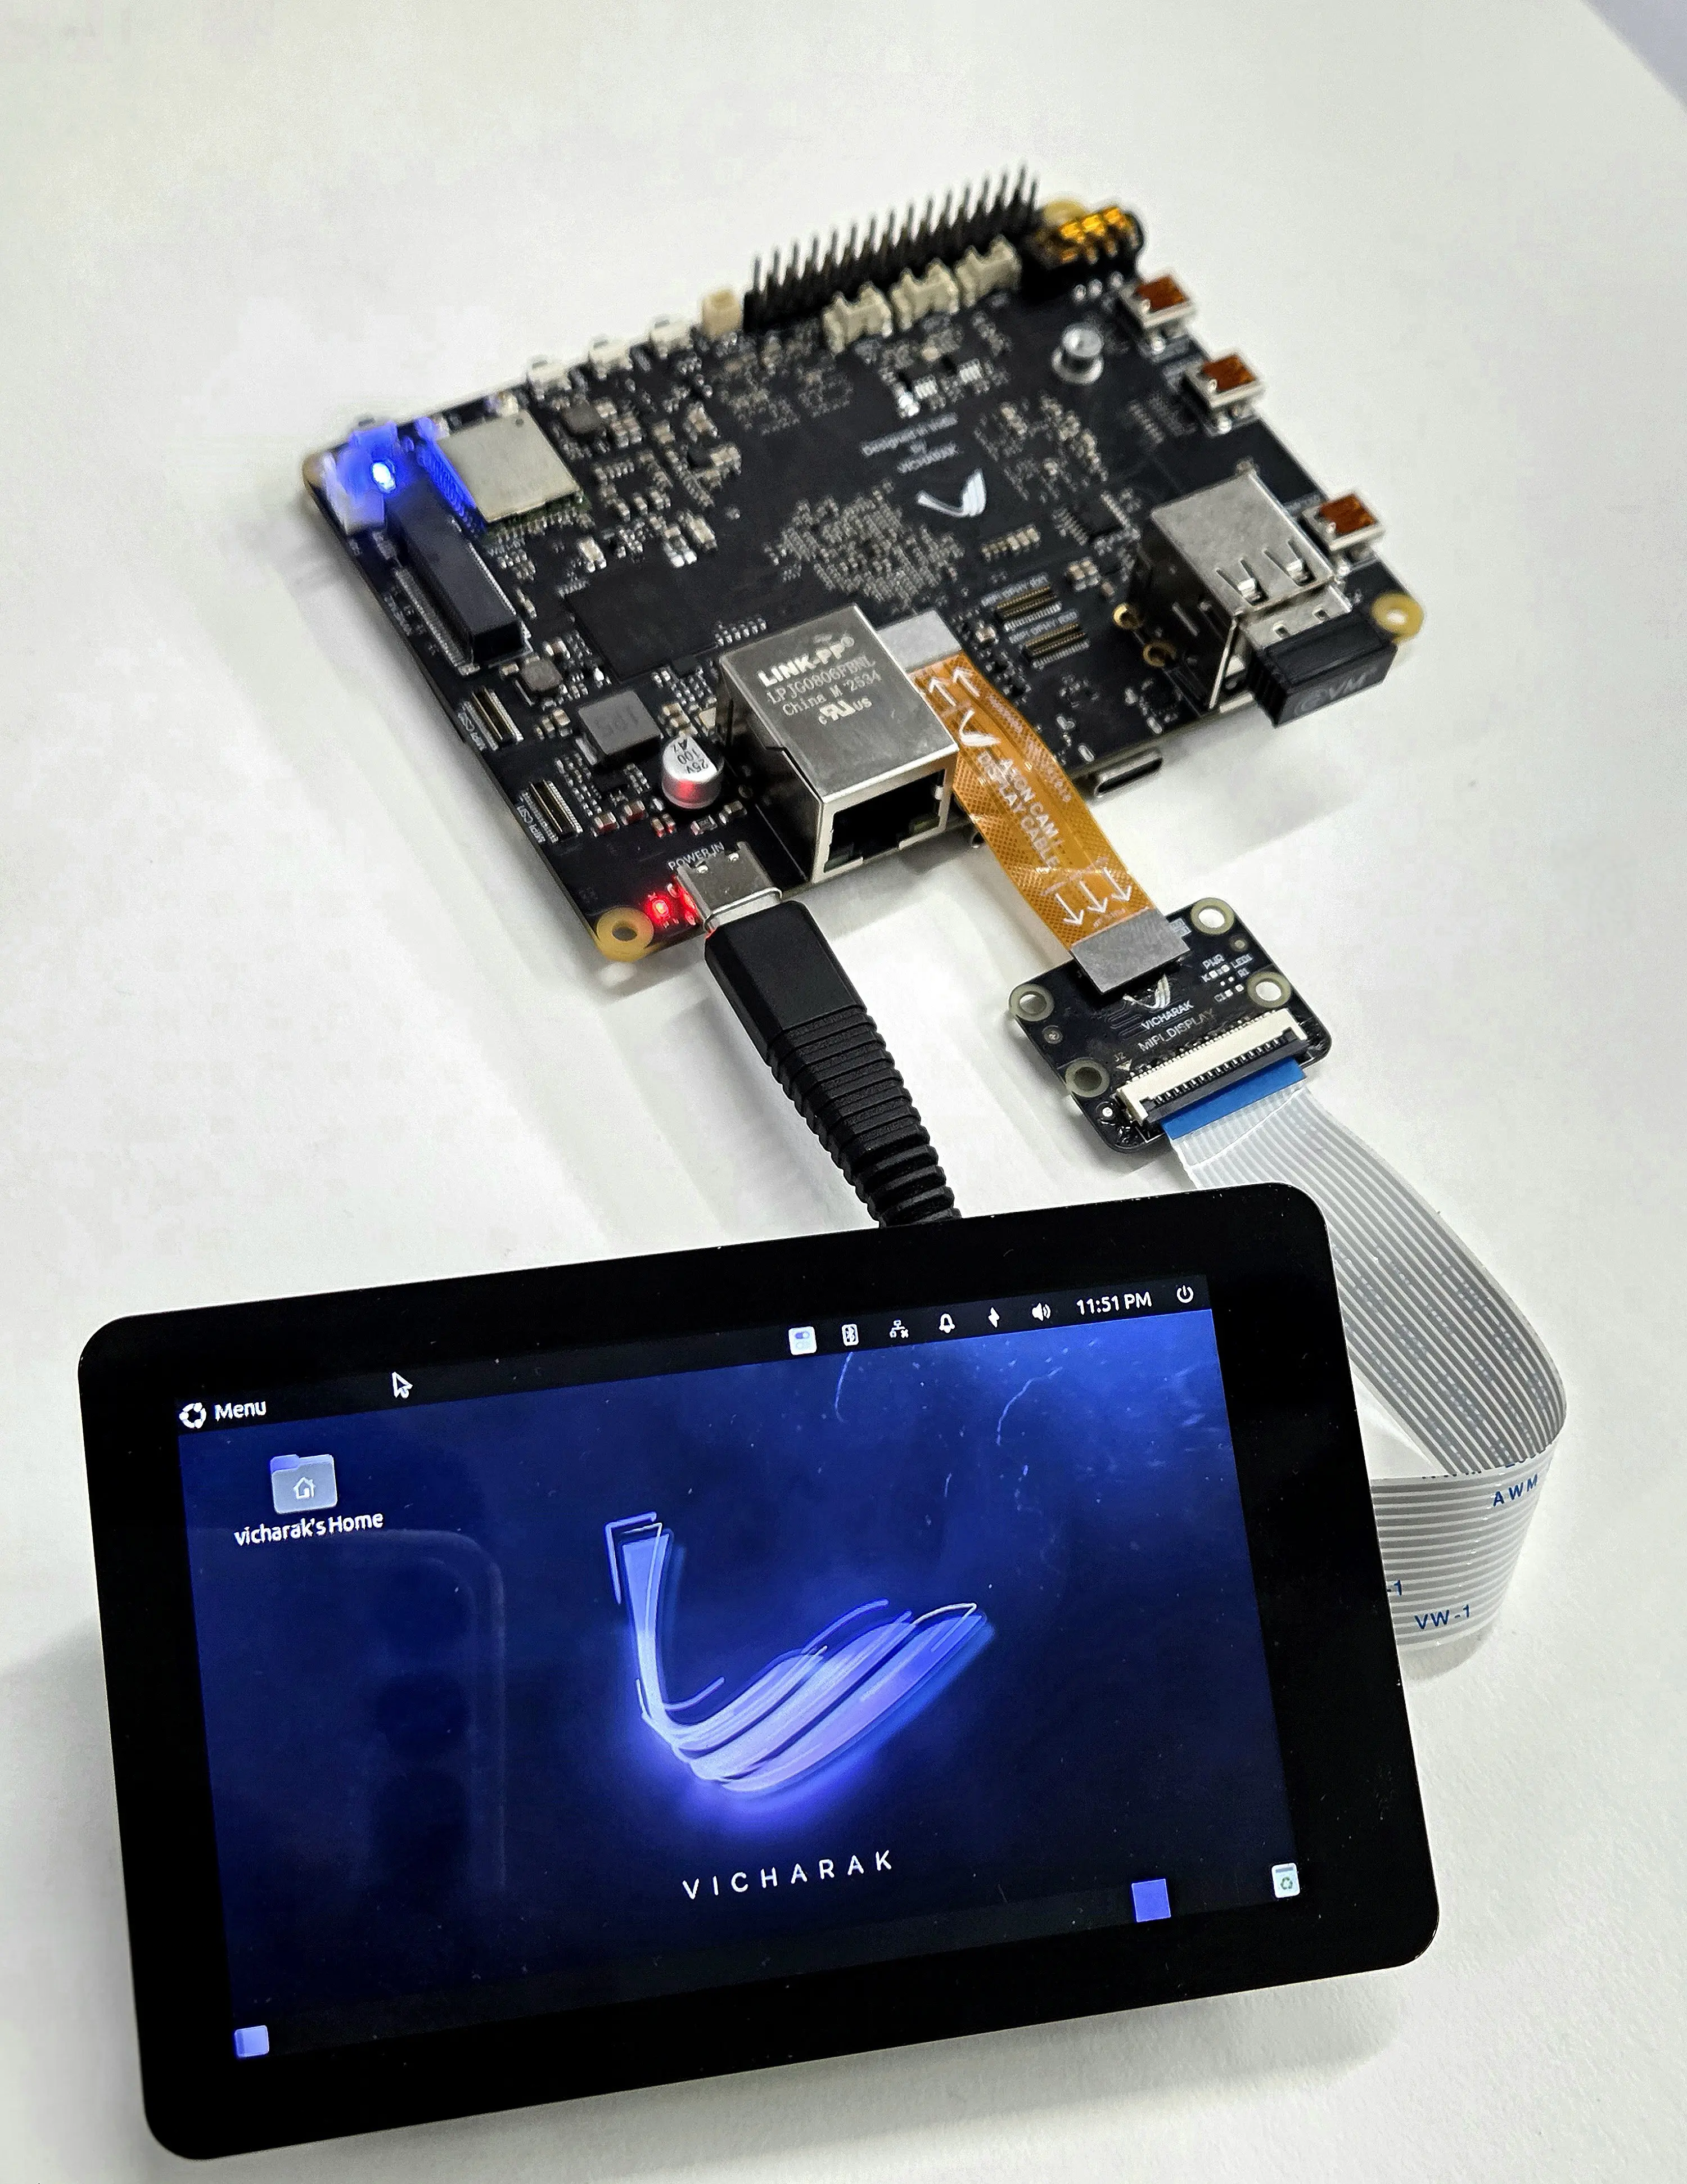
MIPI DSI Display
Configure Kernel and make overlays according to MIPI-DSI Display
Vicharak PCB For DSI Display
Vicharak Flex Cable 30 Pin 0.4mm Pitch Cable (Golden Color)
Make sure, You have installed latest kernel, If not. Please run command below.
sudo apt update
sudo apt reinstall linux-image-6.1.75-axon
Configure display timings and panel driver
For Open Source Contribution:
Vicharak Kernel
https://github.com/vicharak-in/vicharak-linux-kernel.git
Give support of Display driver and overlays, and compile kernel and add overlays in
/boot/overlays-<uname -r>-axonfolder. You can lookarch/arm64/boot/dts/rockchip/overlaysfolder.Ensure the kernel panel/bridge driver is configured with the correct mode (e.g., resolution, refresh rate, and color depth) via the device tree overlay or panel driver.
If a custom timing is required, provide a panel node in the overlay with: - display-mode or timing parameters - pixel clock, hsync/vsync, and back porch values - bus format (e.g., RGB888)
Waveshare 4inch MIPI Display Support
Steps to follow for Configuration
Open a terminal window (
Ctrl+Alt+T).Run command
sudo vicharak-configin it.Select
Overlaysoptions in it by pressingenterkey.
┌───────────────────────────────────┤ VICHARAK_CONFIG ├────────────────────────-───────────┐
│ Please select an option below:                                                           │
│                                                                                          │
│                                   System Maintanince                                     │
│                                       Hardware                                           │
│                                       Overlays                                           │
│                                     Connectivity                                         │
│                                   Advanced Options                                       │
│                                     User Settings                                        │
│                                     Localization                                         │
│                                         About                                            │
│                                                                                          │
│                      <Ok>                               <Cancel>                         │
│                                                                                          │
└──────────────────────────────────────────────────────────────────────────────────────────┘
You will see Warning Page, click on
yesand selectManage Overlaysoptions.
┌───────────────────────────────────┤ VICHARAK_CONFIG ├────────────────────────────────────┐
│ Configure Device Tree Overlay                                                            │
│                                                                                          │
│                                Manage overlays                                           │
│                                View overlay info                                         │
│                                Install 3rd party overlay                                 │
│                                Reset overlays                                            │
│                                                                                          │
│                                                                                          │
│                      <Ok>                               <Cancel>                         │
└──────────────────────────────────────────────────────────────────────────────────────────┘
Select overlays as per your connection of MIPI Display of connector Tx0 / Tx1 by pressing
spacebaron keyboard, then selectOk.
┌──────────────────────────────────┤ VICHARAK_CONFIG ├─────────────────────────────────────┐
│ Please select overlays:                                                                  │
│                                                                                                         │
│  [ ] Enable DP connector-split mode Axon V0.3                                            │
│  [ ] Enable RasPi Camera V1.3 (OV5647) on CSI0 Alpha Axon V0.3 [OFF]                     │
│  [ ] Enable RasPi Camera V1.3 (OV5647) on CSI1 Alpha Axon V0.3 [OFF]                     │
│  [ ] Enable RasPi Camera V1.3 (OV5647) on CSI1 Alpha Axon V0.3 [OFF]                     │
│  [ ] Enable RasPi Camera V1.3 (OV5647) on CSI1 Alpha Axon V0.3 [OFF]                     │
│  [ ] Enable RasPi Camera V1.3 (OV5647) on dphy RX0 Alpha Axon V0.3 [OFF]                 │
│  [ ] Enable RasPi Camera V1.3 (OV5647) on dphy RX1 Aplha Axon V0.3 [OFF]                 │
│  [ ] Enable I2C1 on 30-Pin GPIO Header Axon V0.3                                         │
│  [ ] Enable I2C2 on 30-Pin GPIO Header Axon V0.3                                         │
│  [ ] Enable I2C5 on 30-Pin GPIO Header Axon V0.3                                         │
│  [ ] Enable I2C7 on 30-Pin GPIO Header Axon V0.3                                         │
│  [ ] Enable PWM0 on 30 Pin GPIO Header Axon V0.3                                         │
│  [ ] Enable PWM1_M0 on 30 Pin GPIO Header Axon V0.3                                      │
│  [ ] Enable PWM1_M0 on 30 Pin GPIO Header Axon V0.3                                      │
│  [ ] Enable UART1 on 30 Pin GPIO Header Axon V0.3                                        │
│  [ ] Enable UART4 on 30 Pin GPIO Header Axon V0.3                                        │
│  [ ] Enable UART6 on 30 Pin GPIO Header Axon V0.3                                        │
│  [*] Enable Waveshare 4inch DSI LCD DPHY TX0 Axon V0.3                                   │
│  [ ] Enable Waveshare 4inch DSI LCD DPHY TX1 Axon V0.3                                   │
│                                                                                          │
│                                                                                          │
│                                                                                          │
│                                                                                          │
│                     <Ok>                         <Cancel>                                │
│                                                                                          │
└──────────────────────────────────────────────────────────────────────────────────────────┘
To return back to terminal, press the
Esckey until you exit from it.In order to enable your configuration, Restart your computer or Run command
sudo rebootin terminal.
Verify after reboot
xrandr will be shown all supported resolution by DSI Display.
xrandr
Check kernel logs for DSI panel/properties:
dmesg | grep -i dsi
Confirm a display is active (if supported by the kernel):
ls /sys/class/graphics/fb*
cat /sys/class/graphics/fb0/name
Troubleshooting
If dmesg reports inability to initialize DSI, verify: - TX0 / TX1 wiring and connector integrity - Correct overlay name and that the overlay is loaded - Kernel supports the specific MIPI Display
If the display remains dark, check that a valid panel/bridge device is registered and that the framebuffer is assigned (fb0, fb1, etc.)
Review documentation for model-specific timing and initialization sequences of Display