Type-C DP 1.4a
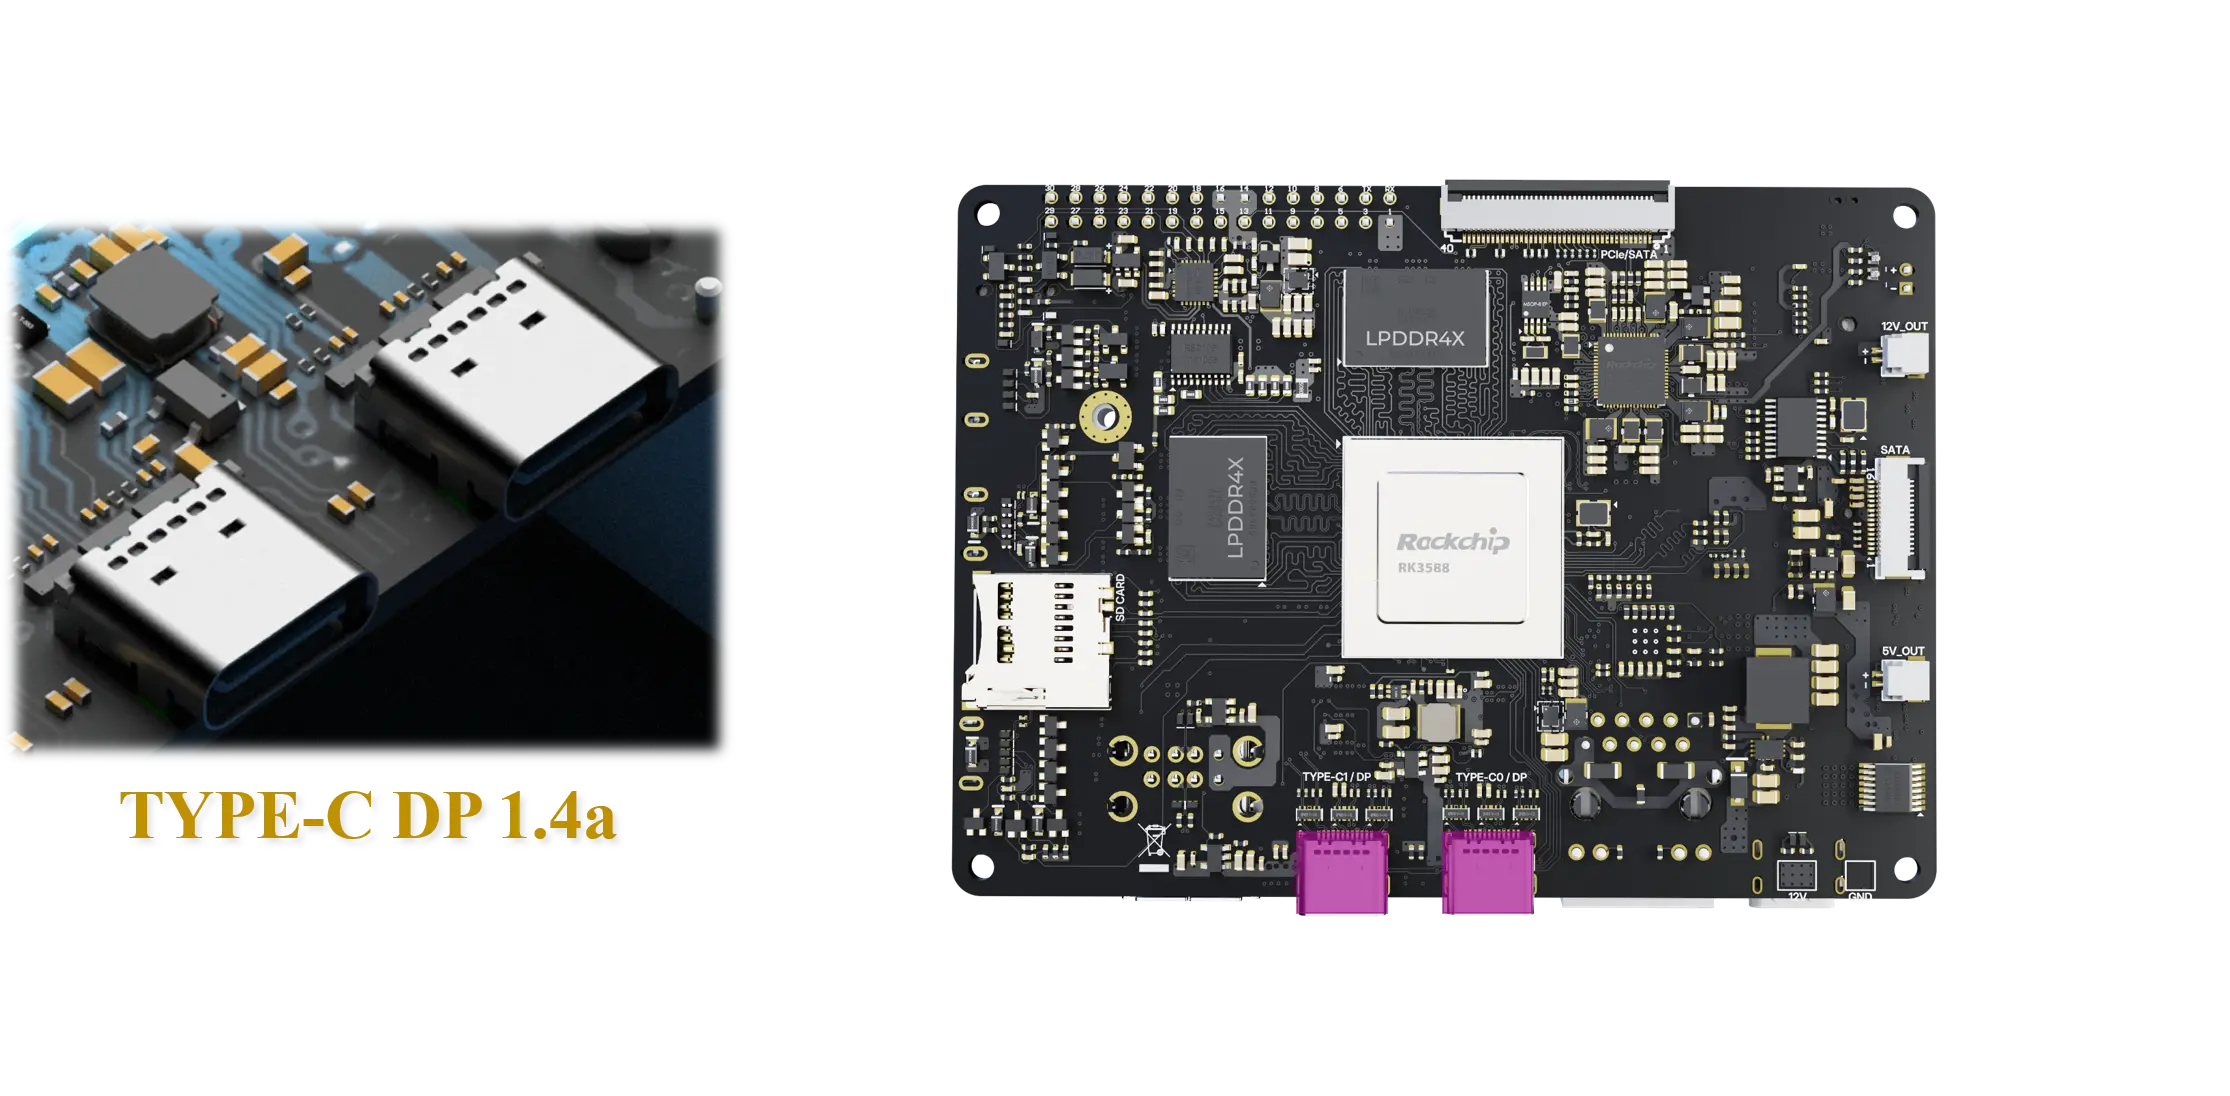
Axon provides 2x multiplexed Type-C DisplayPort 1.4a interface for high-resolution display output with support for multiple displays and high video bandwidth. The DP connector on RK3588 is used for direct connections to DP-compatible displays, projectors, and USB-C docking stations.
Getting Started
Prerequisites
Type-C DisplayPort 1.4a compatible display, or monitor
Axon with DP connector
USB-C cable to your display port(HDMI , VGA , others) in your display
How to use
Connect one end of your USB-C cable to axon board to the usb-ports shown in image
Connect the other end of your USB-C cable to your display
You should get the Vichrak configured displayed on your monitor
Configure DisplayPort and video mode
1. Check if Display is detected
Use xrandr to show all supported resolutions and refresh rates available on DP output:
xrandr
Example output:
Screen 0: minimum 320 x 200, current 1280 x 1024, maximum 16384 x 16384
HDMI-1 disconnected (normal left inverted right x axis y axis)
HDMI-2 disconnected (normal left inverted right x axis y axis)
DP-1 disconnected (normal left inverted right x axis y axis)
DP-2 connected 1280x1024+0+0 (normal left inverted right x axis y axis) 376mm x 301mm
   1280x1024     60.02*+  75.02
   1152x864      75.00
   1024x768      75.03    60.00
   800x600       75.00    68.32
   640x480       75.00    59.94
   720x400       70.08
Key Information from Output
Here, DP-2 is shown as connected, which shows that your display has successfully connected to axon
Numbers on right = Available refresh rates in Hz
connected= Display is detected and connecteddisconnected= Display not detected
2. Auto-enable Display (Recommended)
Automatically enable the display with optimal settings:
xrandr --output DP-2 --auto
3. Set Custom Resolution and Refresh Rate
Note
Actual supported resolutions depend on the capabilities of the connected display and the configured DP lanes.
Manually configure display resolution and refresh rate:
xrandr --output DP-2 --mode 1280x1024 --rate 60
Common xrandr Parameters
Parameter |
Description |
|---|---|
|
Display output name (DP-1, DP-2, HDMI-1, etc.) |
|
Resolution in format WIDTHxHEIGHT (e.g., 1280x1024) |
|
Refresh rate in Hz (e.g., 60) |
|
Auto-detect and apply optimal settings |
|
Disable the display |
|
Scale output (e.g., 1.0 for normal, 2.0 for 2x zoom) |
DP Connector-Split Mode
Axon supports DP connector-split mode. When enabled, 2 USB-C DisplayPort connector can output split screen(50:50) to two external monitors . This feature behind the scene still uses same video port, so using this users can use more than 4 display screen on axon , if using all ports you can connect 6 screens.
Hardware Requirements
To use DP connector-split mode, the following hardware is required:
Two USB Type-C to Display cable
Two external monitors
After making the connection and booting the device follow below config guide
Steps to follow for Configuration
Open a terminal window (
Ctrl+Alt+T).Run command
sudo vicharak-configin it.Select
Overlaysoptions in it by pressingenterkey.
┌───────────────────────────────────┤ VICHARAK_CONFIG ├────────────────────────-───────────┐
│ Please select an option below:                                                           │
│                                                                                          │
│                                   System Maintanince                                     │
│                                       Hardware                                           │
│                                       Overlays                                           │
│                                     Connectivity                                         │
│                                   Advanced Options                                       │
│                                     User Settings                                        │
│                                     Localization                                         │
│                                         About                                            │
│                                                                                          │
│                      <Ok>                               <Cancel>                         │
│                                                                                          │
└──────────────────────────────────────────────────────────────────────────────────────────┘
You will see Warning Page, click on
yesand selectManage Overlaysoptions.
┌───────────────────────────────────┤ VICHARAK_CONFIG ├────────────────────────────────────┐
│ Configure Device Tree Overlay                                                            │
│                                                                                          │
│                                Manage overlays                                           │
│                                View overlay info                                         │
│                                Install 3rd party overlay                                 │
│                                Reset overlays                                            │
│                                                                                          │
│                                                                                          │
│                      <Ok>                               <Cancel>                         │
└──────────────────────────────────────────────────────────────────────────────────────────┘
Select overlay Enable DP connector-split mode Axon V0.3 by pressing
spacebaron keyboard, then selectOk.
┌──────────────────────────────────┤ VICHARAK_CONFIG ├─────────────────────────────────────┐
│ Please select overlays:                                                                  │
│                                                                                                         │
│  [*] Enable DP connector-split mode Axon V0.3                                            │
│  [ ] Enable RasPi Camera V1.3 (OV5647) on CSI0 Alpha Axon V0.3 [OFF]                     │
│  [ ] Enable RasPi Camera V1.3 (OV5647) on CSI1 Alpha Axon V0.3 [OFF]                     │
│  [ ] Enable RasPi Camera V1.3 (OV5647) on CSI1 Alpha Axon V0.3 [OFF]                     │
│  [ ] Enable RasPi Camera V1.3 (OV5647) on CSI1 Alpha Axon V0.3 [OFF]                     │
│  [ ] Enable RasPi Camera V1.3 (OV5647) on dphy RX0 Alpha Axon V0.3 [OFF]                 │
│  [ ] Enable RasPi Camera V1.3 (OV5647) on dphy RX1 Aplha Axon V0.3 [OFF]                 │
│  [ ] Enable I2C1 on 30-Pin GPIO Header Axon V0.3                                         │
│  [ ] Enable I2C2 on 30-Pin GPIO Header Axon V0.3                                         │
│  [ ] Enable I2C5 on 30-Pin GPIO Header Axon V0.3                                         │
│  [ ] Enable I2C7 on 30-Pin GPIO Header Axon V0.3                                         │
│  [ ] Enable PWM0 on 30 Pin GPIO Header Axon V0.3                                         │
│  [ ] Enable PWM1_M0 on 30 Pin GPIO Header Axon V0.3                                      │
│  [ ] Enable PWM1_M0 on 30 Pin GPIO Header Axon V0.3                                      │
│  [ ] Enable UART1 on 30 Pin GPIO Header Axon V0.3                                        │
│  [ ] Enable UART4 on 30 Pin GPIO Header Axon V0.3                                        │
│  [ ] Enable UART6 on 30 Pin GPIO Header Axon V0.3                                        │
│  [ ] Enable Waveshare 4inch DSI LCD DPHY TX0 Axon V0.3                                   │
│  [ ] Enable Waveshare 4inch DSI LCD DPHY TX1 Axon V0.3                                   │
│                                                                                          │
│                                                                                          │
│                                                                                          │
│                                                                                          │
│                     <Ok>                         <Cancel>                                │
│                                                                                          │
└──────────────────────────────────────────────────────────────────────────────────────────┘
To return back to terminal, press the
Esckey until you exit from it.In order to enable your configuration, Restart your computer or Run command
sudo rebootin terminal.
Troubleshooting
If dmesg reports inability to initialize DP, verify:
Type-C DP cable and connector integrity
Correct overlay name and that the overlay is loaded
Kernel supports DP output
External display is powered on and set to the correct input
If the display remains dark, check that:
DP display is properly detected in
xrandrA valid framebuffer is assigned (fb0, fb1, etc.)
Display resolution is supported by the connected monitor
Review documentation for model-specific DP timing and initialization sequences
Use
xrandrto manually set display resolution and refresh rate:xrandr --output DP-1 --mode 1920x1080 --rate 60