SATA
Note
The vicharak-axon board includes a native SATA interface designed to connect one or more SATA drives. This page documents how to use the SATA interface on the board.
Overview
The SATA interface on the vicharak-axon board is exposed to the host operating system as standard storage devices (e.g., /dev/sda or /sdX).
The interface is designed for straightforward data transfer, drive management, and typical OS-level tooling (partitioning, formatting, mounting, SMART monitoring).
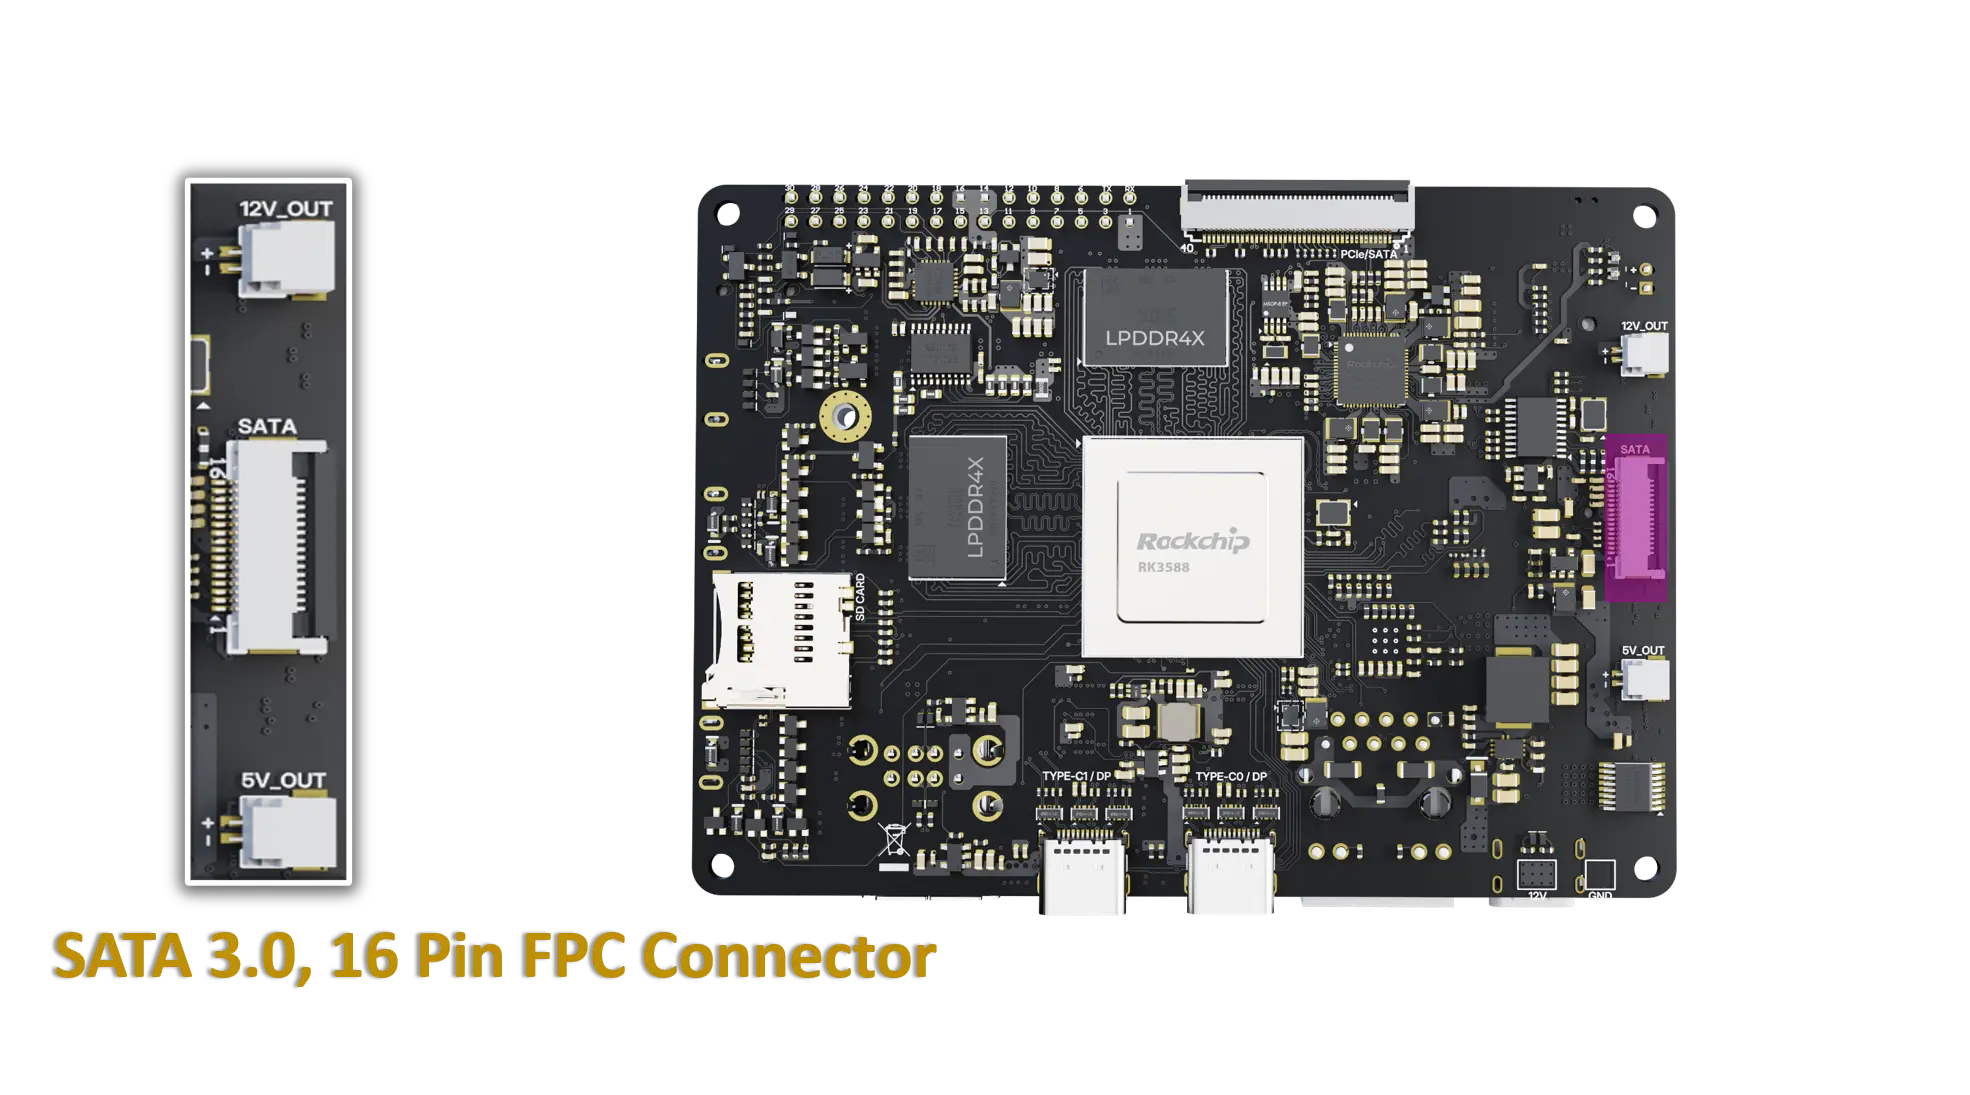
SATA connectors and power
The board provides a 16-pin SATA 3.0 connector that integrates both SATA data and power signals.
Data connector: Pins 01 - 07
Power connector: Pins 08 - 16
16-Pin SATA Connector Pinout:
Pin |
Signal |
|---|---|
01 |
GND |
02 |
SATA30_0_TX_P |
03 |
SATA30_0_TX_N |
04 |
GND |
05 |
SATA30_0_RX_N |
06 |
SATA30_0_RX_P |
07 |
GND |
08 |
12V |
09 |
12V |
10 |
12V |
11 |
GND |
12 |
GND |
13 |
5V |
14 |
5V |
15 |
5V |
16 |
GND |
Getting started
Note
In the following commands, the SATA storage device is represented as /dev/sdX. Use the lsblk command to determine the correct device name assigned by the Linux system, and replace /dev/sdX accordingly before executing the commands.
Steps:
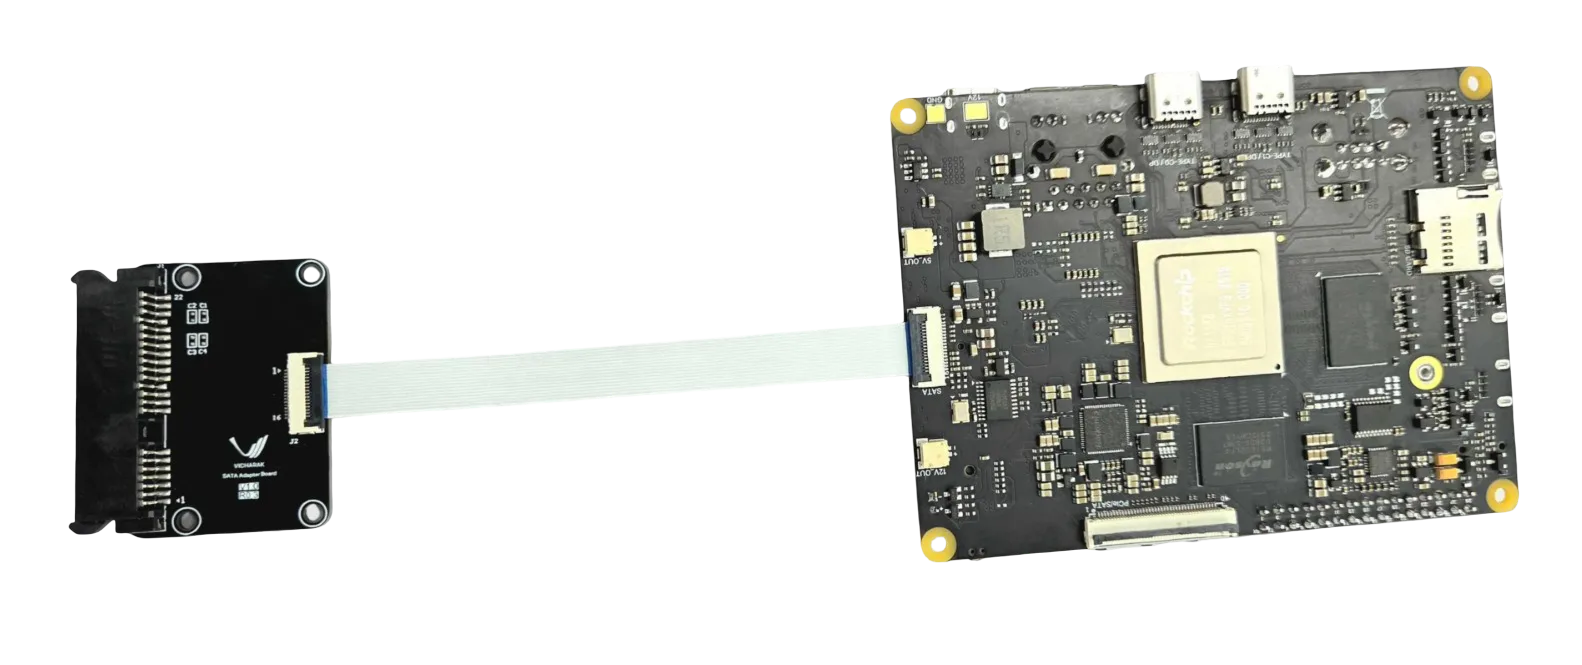
Connect a SATA drive like a SATA HDD or SSD to the board using a Vicharak SATA expansion board or HAT with SATA data cable as shown in image above.
Power on the board and boot into the operating system.
Confirm the OS detects the drive:
lsblk
sudo dmesg | grep -i sata
to verify /dev/sdX (e.g., /dev/sda or /dev/sdb) appears.
Partition and format the drive as needed:
Create a partition table and partitions.
Create filesystems (e.g., ext4, xfs).
Mount the filesystem: - Create a mount point and mount the new partition:
sudo mkdir -p /mnt/data
sudo mount /dev/sdX1 /mnt/data
Using Linux with the SATA interface
Detecting drives:
lsblk -f
sudo fdisk -l
Creating partitions and filesystems:
sudo parted /dev/sdX mklabel gpt
sudo parted -a optimal /dev/sdX mkpart primary ext4 0% 100%
sudo mkfs.ext4 /dev/sdX1
Mounting and fstab:
sudo mkdir -p /mnt/data
sudo mount /dev/sdX1 /mnt/data
Basic health and monitoring:
sudo smartctl -a /dev/sdX
sudo lsblk -f
sudo blkid
Troubleshooting
Drive not detected:
Verify power is connected to the drive.
Re-seat the SATA data and power cables.
Try a different SATA port on the board.
Drive detected but inaccessible:
Verify partition table and filesystem:
sudo fdisk -l /dev/sdX
sudo file -s /dev/sdX1
Check dmesg for errors related to the SATA controller or drive:
dmesg | grep -i sata
Data access issues:
Check filesystem integrity:
sudo fsck /dev/sdX1Ensure proper mounting options and permissions.