U-Boot (Universal Boot Loader)
What actually is u-boot?
U-Boot Das U-Boot is an open-source bootloader that can be used on various
platforms such as ARM, X86, MIPS, RISC-V and many more.
It is the Universal Boot Loader project and is actually used to boot the
Linux kernel in your Vicharak board.
Note
More information on u-boot can be found on U-Boot Wikipedia.
Important
Vicharak provides two different sources of U-Boot for the Vaaman board.
- 1. Vendor specific u-boot (u-boot version v2017.09)
Vendor specific u-boot is a fork of u-boot provided by Rockchip with additional features including Vaaman board support.
- 2. Mainline u-boot (u-boot version v2023.11)
Mainline u-boot is the upstream u-boot maintained by Open-source developers. It contains the bleeding edge features, SoC improvements and bug fixes.
There are separate methods to compile and flash u-boot for these above sources.
Tip
It is generally not recommended to use mainline u-boot with your Vicharak linux images. Because those images follows Rockchip’s boot flow. And things may break due to incompatible changes in mainline u-boot.
Consider the following when choosing:
Use vendor-specific U-Boot for Vicharak Linux images following Rockchip’s boot flow.
Mainline U-Boot is suitable for custom or community images like Manjaro ARM, Armbian, etc.
Build Vicharak Vaaman u-boot from source
1. Build Vendor specific u-boot
Warning
It is recommended to use Ubuntu 20.04 and Higher or Debian 11 and Higher environment for building.
Installing the system dependencies
sudo apt update -y

sudo apt-get install -y build-essential python3 python-is-python3 libssl-dev \
    git-core gcc-arm-linux-gnueabi gcc-arm-linux-gnueabihf u-boot-tools \
    device-tree-compiler gcc-aarch64-linux-gnu mtools parted pv bc bison flex
Getting the source
The source code for the u-boot has been published to our GitHub organisation.
You can either clone the repository or download the source code from GitHub.
Tip
We recommend that you use git clone method to clone the repository as it is
easier to maintain.
git clone https://github.com/vicharak-in/rockchip-linux-u-boot -b master
Tip
Use git clone --depth=1 to shallow clone the repository
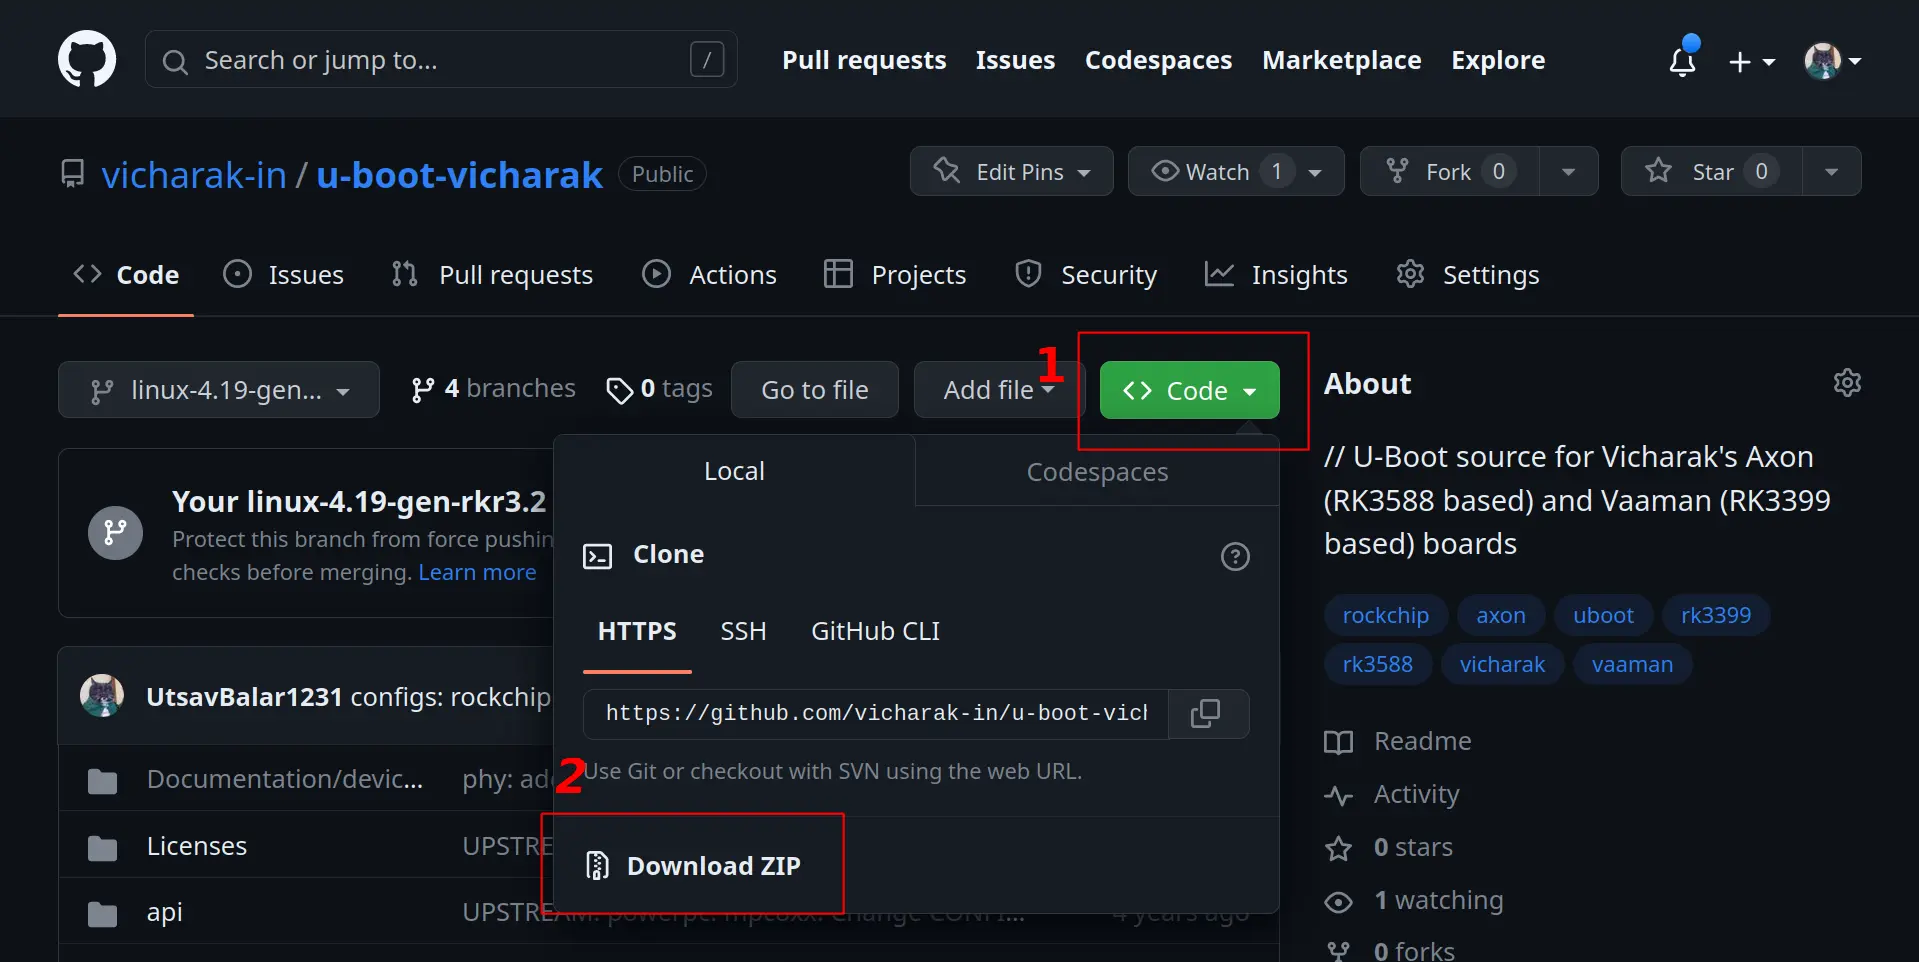
Follow the steps in above image.
Open the GitHub repository and click on the “<> Clone” button.
Click on the “Download ZIP” option.
After successful download, unpack the archive using any archiver tool (7zip, unzip, etc).
Use the following command to download the source code
wget https://github.com/vicharak-in/rockchip-linux-u-boot/archive/refs/heads/master.zip

unzip master.zip
mv rockchip-linux-u-boot-master rockchip-linux-u-boot
Compiling vendor specific u-boot
There are two methods to compile vendor specific u-boot.
Rockchip u-boot build script
Vicharak u-boot build script
Enter the u-boot directory
cd <u-boot-directory>
./make.sh rk3399-vaaman
git submodule update --init

./vicharak/build.sh vicharak/rk3399-vaaman.mk
./vicharak/build.sh -b
Tip
Vicharak u-boot script is recommended for ease of use
The script is located in vicharak/build.sh and basic operations are as follows:
    ─────────────────────────────────────────────────────────────────────
              Vicharak U-Boot Build Script - Usage Guide
    ─────────────────────────────────────────────────────────────────────
     Usage: ./vicharak/build.sh [OPTIONS]

     Available Options:
      lunch            | -l    : Prepare the environment for the chosen device
      info             | -i    : Display current u-boot setup details
      clean            | -c    : Remove u-boot build artifacts
      build            | -b    : Compile the u-boot for the chosen device
      ubootdeb         | -B    : Generate a debian package for the u-boot
      update_defconfig | -u    : Update the u-boot configuration with the latest changes
      help             | -h    : Display this usage guide
    ─────────────────────────────────────────────────────────────────────
Output files will be inside current folder.
Make sure idblock.bin, uboot.img and trust.img images are there.
idblock.bin
uboot.img
trust.img
rk3399_loader_v1.xx.xxx.bin
Note
What exactly are rk3399_loader_v1.xx.xxx.bin, idblock.bin uboot.img and
trust.img?
Read Rockchip’s boot option for more information.
Tip
For Vendor u-boot source there is an option to build debian package as well.
If you are using Vicharak build script then, use the following command to build a debian package of the uboot.
./vicharak/build.sh -B
or if you are using Rockchip build script then use the following command to build a debian package of the uboot.
dpkg-buildpackage -b -rfakeroot -us -uc -a arm64
How to flash or upgrade u-boot
Rockchip’s boot flow
+--------+----------------+----------+-------------+---------+
| Boot   | Terminology #1 | Actual   | Rockchip    | Image   |
| stage  |                | program  |  Image      | Location|
| number |                | name     |   Name      | (sector)|
+--------+----------------+----------+-------------+---------+
| 1      |  Primary       | ROM code | BootRom     |         |
|        |  Program       |          |             |         |
|        |  Loader        |          |             |         |
|        |                |          |             |         |
| 2      |  Secondary     | U-Boot   |idbloader.img| 0x40    | pre-loader
|        |  Program       | TPL/SPL  |idblock.bin  |         |
|        |  Loader (SPL)  |          |             |         |
|        |                |          |             |         |
| 3      |  -             | U-Boot   | u-boot.itb  | 0x4000  | including u-boot and atf
|        |                |          | uboot.img   |         | only used with miniloader
|        |                |          |             |         |
|        |                | ATF/TEE  | trust.img   | 0x6000  | only used with miniloader
|        |                |          |             |         |
| 4      |  -             | kernel   | boot.img    | 0x8000  |
|        |                |          |             |         |
| 5      |  -             | rootfs   | rootfs.img  | 0x40000 |
+--------+----------------+----------+-------------+---------+
Read more information on Rockchip’s boot option
Once you have successfully compiled the u-boot. You are now ready to flash it on your vaaman board.
Secondary Program Loader (SPL)
For Vicharak eMMC builds you can follow the Linux Upgrade Tool guide
See also
If you are not using UMS mode then make sure you are able to boot your board
using any other storage media. (SD-card, NVMe or even the same eMMC).
To write the vendor U-Boot image to the eMMC, use the following commands.
(Assuming the eMMC is at /dev/mmcblk1.)
sudo dd if=idblock.bin of=/dev/mmcblk1 seek=64; sync
Warning
The block device /dev/mmcblk1 may be different as per the board’s storage configuration.
Confirm the block device using parted /dev/mmcblk<X>.
Alternatively, you can use lsblk to find the block device.
U-boot proper (uboot)
sudo dd if=uboot.img of=/dev/mmcblk1p1; sync
Trust image (trust)
sudo dd if=trust.img of=/dev/mmcblk1p2; sync
Plug the SD-Card into the SD-Card reader and insert the SD-card reader into your PC.
Use the linux
ddutility to write theidblock.binto the SD-Card.
To write the vendor U-Boot image to the SD-Card,
use the following commands. (Assuming the SD card is at /dev/sdb)
sudo dd if=idblock.bin of=/dev/sdb seek=64; sync
Warning
The block device /dev/sdb may be different as per the number of storage devices
connected to your PC.
To check the block device of the SD-Card, run dmesg -Hw in a terminal and,
plug the SD-Card into your PC. You will see something similar to:
[20104.826747] usb 7-1.4.3: new high-speed USB device number 41 using xhci_hcd
[20104.909195] usb 7-1.4.3: New USB device found, idVendor=2207, idProduct=0010, bcdDevice= 2.23
[20104.909211] usb 7-1.4.3: New USB device strings: Mfr=1, Product=2, SerialNumber=3
[20104.909214] usb 7-1.4.3: Product: USB download gadget
...
[20104.914797] usb-storage 7-1.4.3:1.0: USB Mass Storage device detected
[20104.914916] scsi host7: usb-storage 7-1.4.3:1.0
[20105.940727] scsi 7:0:0:0: Direct-Access     Linux    UMS disk 0       ffff PQ: 0 ANSI: 2
...
[20105.947385]  sdc: sdc1 sdc2 sdc3 sdc4 sdc5 sdc6 sdc7 sdc8
[20105.947726] sd 7:0:0:0: [sdc] Attached SCSI removable disk
Confirm the block device using parted /dev/sd<X> or lsblk.
vicharak ~ > sudo parted /dev/sdc
GNU Parted 3.6
Using /dev/sdc
Welcome to GNU Parted! Type 'help' to view a list of commands.
(parted) p
Model: Mass Storage Device (scsi)
Disk /dev/sdc: 15.9GB
Sector size (logical/physical): 512B/512B
Partition Table: gpt
Disk Flags:

Number  Start   End     Size    File system  Name      Flags
 1      8389kB  12.6MB  4194kB               uboot
 2      12.6MB  16.8MB  4194kB               trust
 3      16.8MB  21.0MB  4194kB               misc
 4      21.0MB  155MB   134MB   ext4         boot      legacy_boot
 5      155MB   189MB   33.6MB               recovery
 6      189MB   222MB   33.6MB               backup
 7      222MB   491MB   268MB   ext4         userdata
 8      491MB   15.9GB  15.4GB  ext4         rootfs

(parted) quit
vicharak ~ >
U-boot proper (uboot)
sudo dd if=uboot.img of=/dev/sdb1; sync
Trust image (trust)
sudo dd if=trust.img of=/dev/sdb2; sync
Plug the NVMe into the NVMe reader and insert the NVMe reader into your PC.
Use the linux
ddutility to write theidblock.binto the NVMe.
To write the vendor U-Boot image to the NVMe, use the following commands.
(Assuming the NVMe is at /dev/nvme0n1.)
sudo dd if=idblock.bin of=/dev/nvme0n1 seek=64; sync
Warning
The block device /dev/nvme0n1 may be different as per the number of storage devices
connected to your PC.
To check the block device of the NVMe, run dmesg -Hw in a terminal and,
plug the NVMe into your PC. You will see something similar to:
[  23232.759738] nvme nvme1: 32/0/0 default/read/poll queues
[  23232.763741]  nvme0n1: p1 p2 p3
Confirm the block device using parted /dev/nvme<X>n1 or lsblk.
**U-boot proper (uboot)**

```bash
sudo dd if=uboot.img of=/dev/nvme0n1p1; sync
Trust image (trust)
sudo dd if=trust.img of=/dev/nvme0n1p2; sync
Finally reboot the board.
sudo reboot
Verify the u-boot version
To ensure that U-Boot has been successfully updated, it’s essential to verify the version. Follow these steps:
Enter the u-boot shell
Warning
Make sure that you have followed the serial console setup in the Linux serial console guide.
Open your preferred serial console application.
Reset or power on the board.
Developer Note
Vaaman’s u-boot is configured for development purpose. It will allow you 3 seconds to enter the u-boot shell before booting the kernel.
Quickly press CTRL+c when you see some logs starting to appear on the console.
If you have followed the above steps successfully, you should be able to access a u-boot shell or terminal.
Developer tip
Set CONFIG_BOOTDELAY to 0 in configs/rk3399-vaaman_defconfig to disable the delay.
And recompile the u-boot.
you can verify the u-boot version by using version command.
version
or you can just directly boot the board and see the serial console output during the initial boot process.
There will be a version string printed on the console during boot up.
U-Boot 2017.09-ge629234bf25-230427 #vicharak (Jul 11 2023 - 16:43:11 +0530)
2. Build Mainline u-boot from source
Installing the required system dependencies
sudo apt-get update -y

sudo apt-get install -y build-essential python libssl-dev git-core \
    libgnutls28-dev gcc-arm-linux-gnueabihf u-boot-tools device-tree-compiler \
    gcc-aarch64-linux-gnu mtools parted pv
Getting the Mainline u-boot source
The source code for the mainline u-boot has been published to our GitHub organisation.
Clone the repository using git
git clone https://github.com/vicharak-in/rockchip-linux-u-boot -b vicharak-mainline
Compile ARM trusted firmware
Before compiling the mainline U-Boot, you need to compile ARM trusted firmware (ATF). ATF plays a crucial role in the boot process, handling secure and non-secure world transitions.
Follow these steps to compile ATF:
Clone the ARM trusted firmware source code from ARM’s git server and compile it.
git clone https://git.trustedfirmware.org/TF-A/trusted-firmware-a.git -b master --depth=1

cd trusted-firmware-a
Compile ATF using the specified cross-compiler and platform (rk3399).
make realclean -j$(nproc --all)
make CROSS_COMPILE=aarch64-linux-gnu- PLAT=rk3399 -j$(nproc --all)
Upon successful compilation, the build/ directory will be created.
Copy the compiled
bl31.elffile to the U-Boot directory.
cp build/rk3399/release/bl31/bl31.elf <u-boot-directory>
Compile Mainline u-boot
Enter the u-boot directory and compile the u-boot.
export BL31=bl31.elf

make rk3399-vaaman_defconfig
make CROSS_COMPILE=aarch64-linux-gnu- -j$(nproc --all)
idbloader.img
u-boot.itb
u-boot-rockchip.bin
Flashing Mainline u-boot
Important
Please read the Mainline u-boot note
Vicharak’s mainline u-boot supports a single boot image using binman called
u-boot-rockchip.bin which combines the idbloader.img and u-boot.itb images.
To write the mainline U-Boot image to the SD-Card,
use the following commands. (Assuming the SD-Card is at /dev/sdb and that you
are not using Vicharak provided Linux system images.)
sudo dd if=u-boot-rockchip.bin of=/dev/sdb seek=64; sync
Warning
The block device /dev/sdb may be different as per the number of storage devices
connected to your PC.
To check the block device of the SD-Card, run dmesg -Hw in a terminal and,
plug the SD-Card into your PC. You will see something similar to:
[20104.826747] usb 7-1.4.3: new high-speed USB device number 41 using xhci_hcd
[20104.909195] usb 7-1.4.3: New USB device found, idVendor=2207, idProduct=0010, bcdDevice= 2.23
[20104.909211] usb 7-1.4.3: New USB device strings: Mfr=1, Product=2, SerialNumber=3
[20104.909214] usb 7-1.4.3: Product: USB download gadget
...
[20104.914797] usb-storage 7-1.4.3:1.0: USB Mass Storage device detected
[20104.914916] scsi host7: usb-storage 7-1.4.3:1.0
[20105.940727] scsi 7:0:0:0: Direct-Access     Linux    UMS disk 0       ffff PQ: 0 ANSI: 2
...
[20105.947385]  sdc: sdc1 sdc2 sdc3 sdc4 sdc5 sdc6 sdc7 sdc8
[20105.947726] sd 7:0:0:0: [sdc] Attached SCSI removable disk
Confirm the block device using parted /dev/sd<X> or lsblk.
Vicharak’s mainline u-boot supports a single boot image using binman called
u-boot-rockchip.bin which combines the idbloader.img and u-boot.itb images.
Note
Follow the u-boot USB Mass Storage (UMS) mode for using eMMC as a USB storage device on your Host computer and for flashing.
If you are not using UMS mode then make sure you are able to boot your board
using any other storage media. (SD-card, NVMe or even the same eMMC).
To write the mainline U-Boot image to the eMMC, use the following commands.
(Assuming the eMMC is at /dev/mmcblk1.)
sudo dd if=u-boot-rockchip.bin of=/dev/mmcblk1 seek=64; sync
Warning
For Vicharak provided eMMC/SD-Card images you need to merge partition 1 and 2 into one partition.
Delete the trust partition
sudo parted /dev/mmcblk1 rm 2
Resize the u-boot partition
sudo parted /dev/mmcblk1 resizepart 1 100%
Flash the TPL/SPL combined image
sudo dd if=u-boot-rockchip.bin of=/dev/mmcblk1 seek=64; sync
Warning
On Vicharak Vaaman eMMC will always be at /dev/mmcblk1 if you are using
Vicharak provided kernel and u-boot images.
If you are using your own kernel and u-boot images then you may need to change the block device in the above commands.
To check the block device of the eMMC, run dmesg | grep mmcblk in a terminal.
The result should be something similar to:
[    9.740081] mmc1: new HS400 Enhanced strobe MMC card at address 0001
[    9.741057] mmcblk1: mmc1:0001 BJTD4R 29.1 GiB
[    9.741306] mmcblk1boot0: mmc1:0001 BJTD4R partition 1 4.00 MiB
[    9.741619] mmcblk1boot1: mmc1:0001 BJTD4R partition 2 4.00 MiB
[    9.742187] mmcblk1rpmb: mmc1:0001 BJTD4R partition 3 4.00 MiB, chardev (235:0)
[    9.749068]  mmcblk1: p1 p2 p3 p4 p5 p6 p7 p8
Vicharak’s mainline u-boot supports a single boot image using binman called
u-boot-rockchip.bin which combines the idbloader.img and u-boot.itb images.
To write the mainline U-Boot image to the NVMe, use the following commands.
(Assuming the NVMe is at /dev/nvme0n1.)
sudo dd if=u-boot-rockchip.bin of=/dev/nvme0n1 seek=64; sync
Warning
The block device /dev/nvme0n1 may be different as per the number of storage devices
connected to your PC.
To check the block device of the NVMe, run dmesg -Hw in a terminal and,
plug the NVMe into your PC. You will see something similar to:
[  23232.759738] nvme nvme1: 32/0/0 default/read/poll queues
[  23232.763741]  nvme0n1: p1 p2 p3
Confirm the block device using parted /dev/nvme<X>n1 or lsblk.
Finally reboot the board.
sudo reboot
Verify the Mainline u-boot version
To ensure that U-Boot has been successfully updated, it’s essential to verify the version. Follow these steps:
Enter the u-boot shell
Warning
Make sure that you have followed the serial console setup in the Linux serial console guide.
Open your preferred serial console application.
Reset or power on the board.
Quickly press CTRL+c when you see some logs starting to appear on the console.
If you have followed the above steps successfully, you should be able to access a u-boot shell or terminal.
you can verify the u-boot version by using version command.
version
or you can just directly boot the board and see the serial console output during the initial boot process.
There will be a version string printed on the console during boot up.
U-Boot 2023.11-af329214bf05-230427 #vicharak (Nov 11 2023 - 16:43:11 +0530)