Windows RKDevTool
Pre-Requisites
USB drivers installation
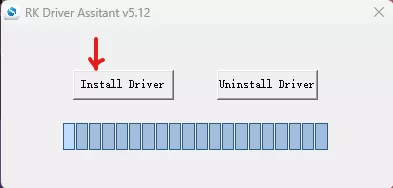
Download the Rockchip USB Drivers-Assistant and unpack it.
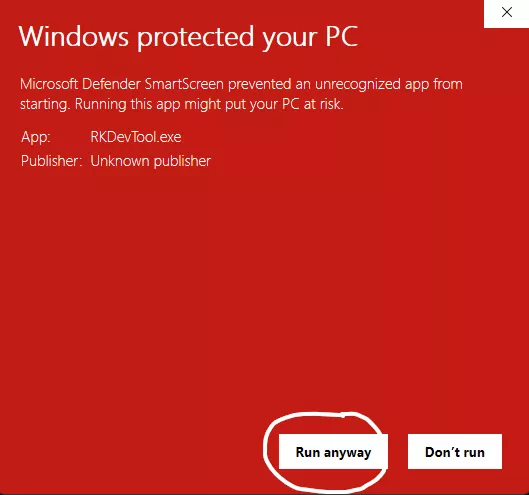
How to fix Windows Protected You PC Error
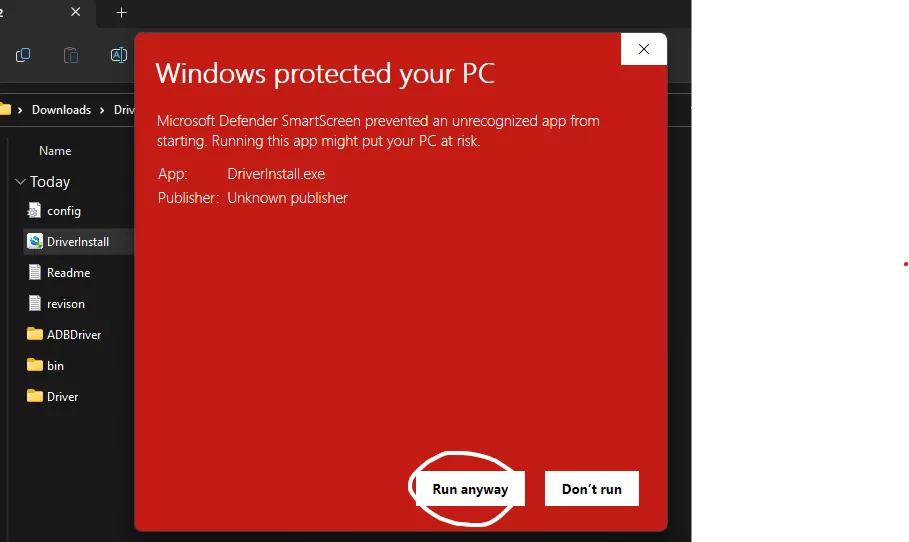
Click on Install button available on the floating menu.
Click on Yes button to confirm the installation.
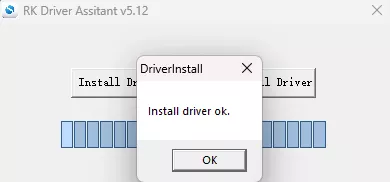
After the installation is complete, click on OK button to close the window.
RKDevTool Installation
Download the Rockchip RKDevTool and unpack it.
Change Tool language to English.
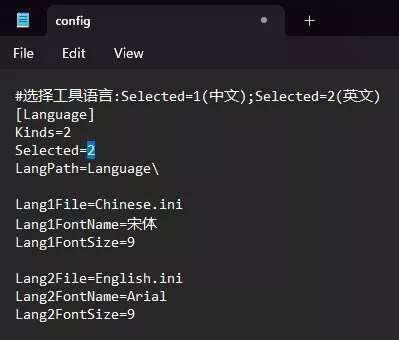
Open the
RKDevToolfolder and edit theconfig.inifile.Change the
Selectedvalue from1to2forLanguageoption.Save the file and close it.
Open the RKDevTool folder and run the RKDevTool.exe file.
How to fix Windows Protected You PC Error
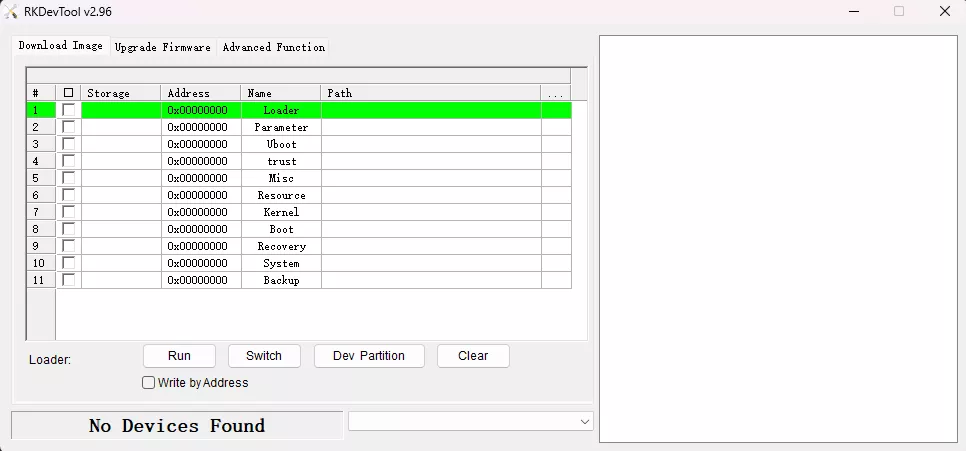
How to use RKDevTool on Windows
Connect the Vaaman board to the PC using the USB cable. You will see the
Found One LOADER Device or Found One MASKROM Device message in the RKDevTool window.
Tip
If you don’t see the Found One LOADER Device or Found One MASKROM Device
message, then you need to put the Vaaman board in the Loader Mode or Maskrom Mode.
Refer to the How to enter Maskrom Mode for more details.
Flash eMMC Image to Vaaman board
Once the Vaaman board is booted into Maskrom mode, you can flash the eMMC image to the board.
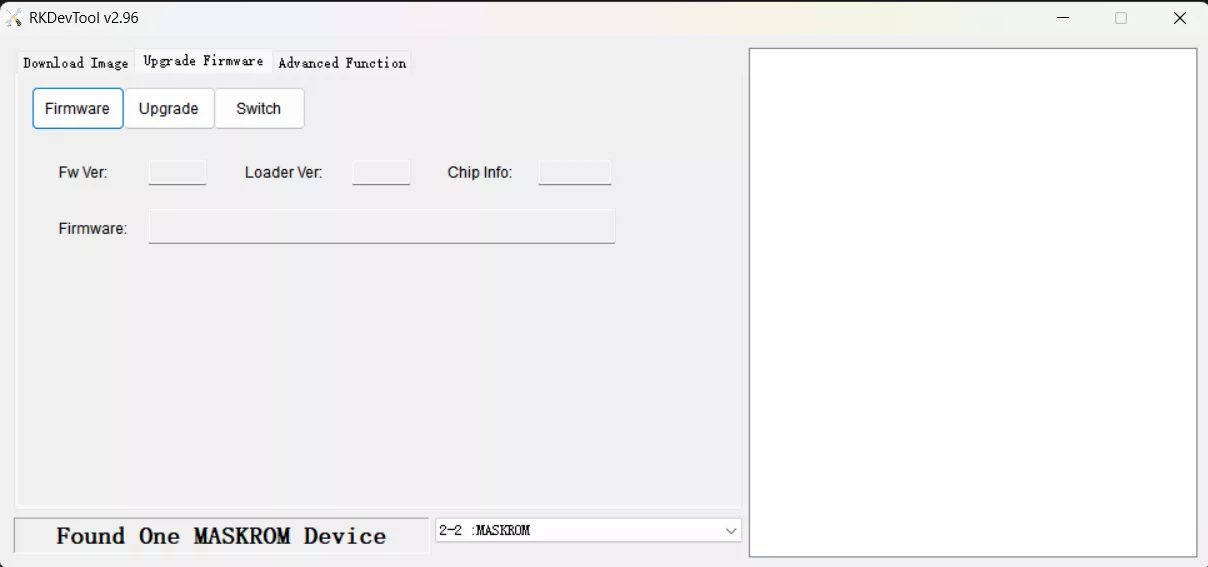
1. Click on the Upgrade Firmware button from the top bar and select the firmware option.
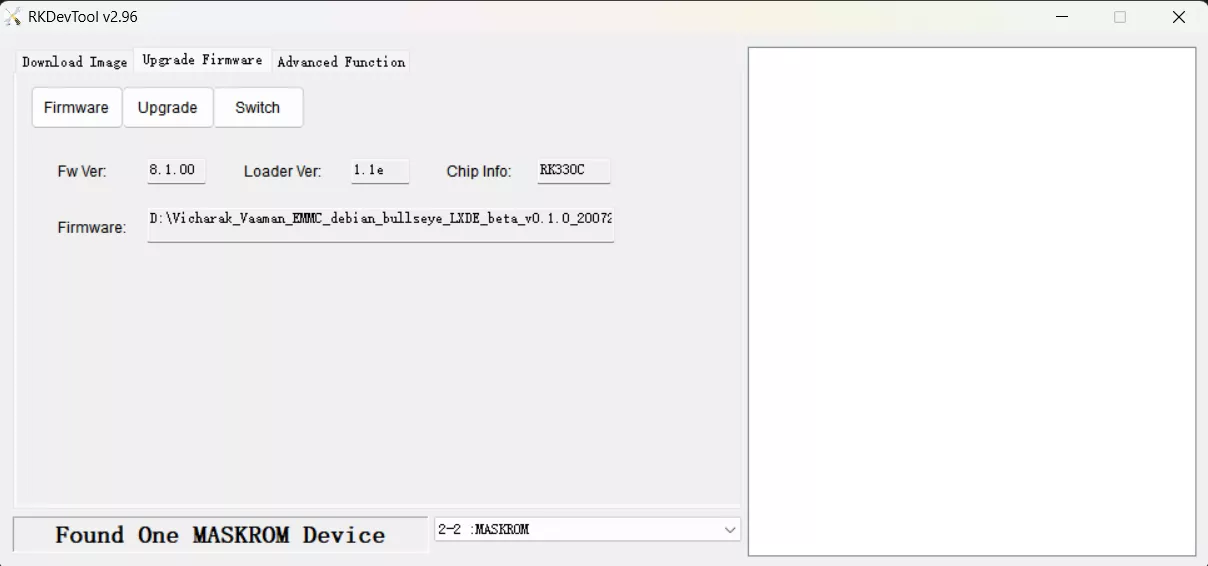
2. Select the firmware file from the firmware folder.
Tip
You can get the latest firmware from the Vaaman Downloads page.
3. Click on the Upgrade button to start the flashing process.

4. Wait for the flashing process to complete.