Booting from SD-card
To make a SD-card bootable, follow these steps:
Format the SD-card
Using a suitable file system (such as FAT32 or EXT4) format the SD-card.
Insert the SD-card into your computer. Use a USB-to-SD adapter if required.
Open the File Explorer and right-click on the SD-card.
Select Format from the drop-down menu.
Select the desired file system (e.g., FAT32) and click Start.
Click OK to confirm the formatting.
Insert the SD-card into your computer. Use USB-to-SD adapter if required.
Open the Disks application if you are using a GUI.
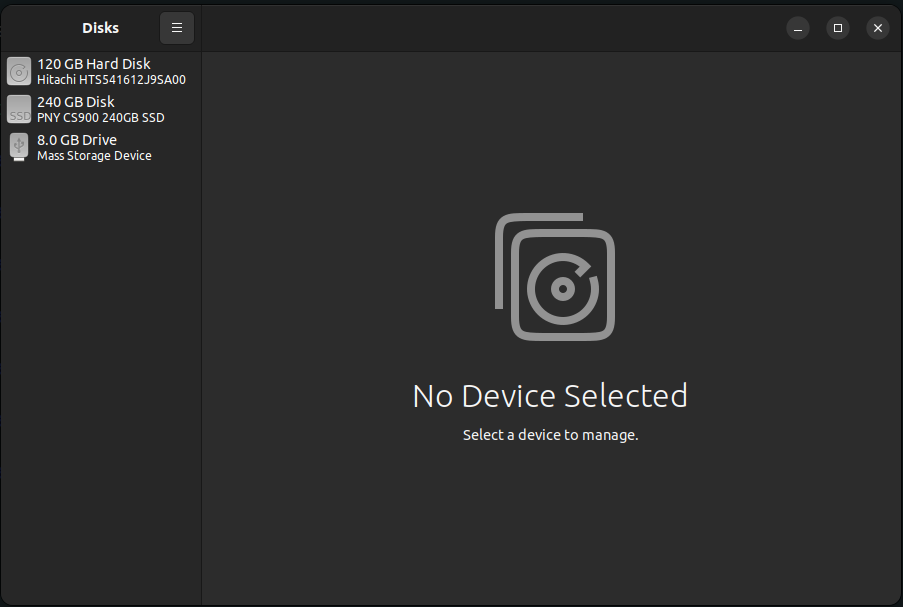
Select the SD-card from the left panel.
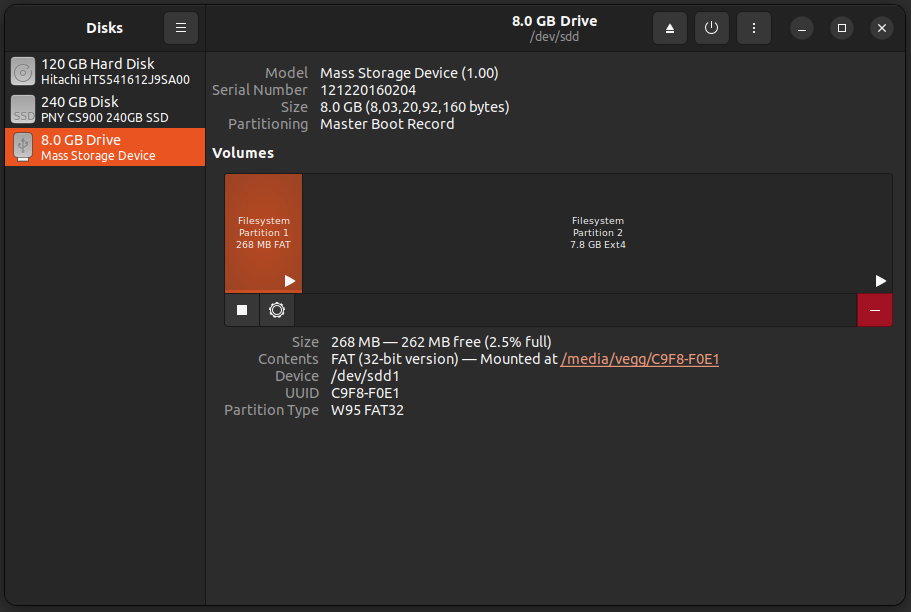
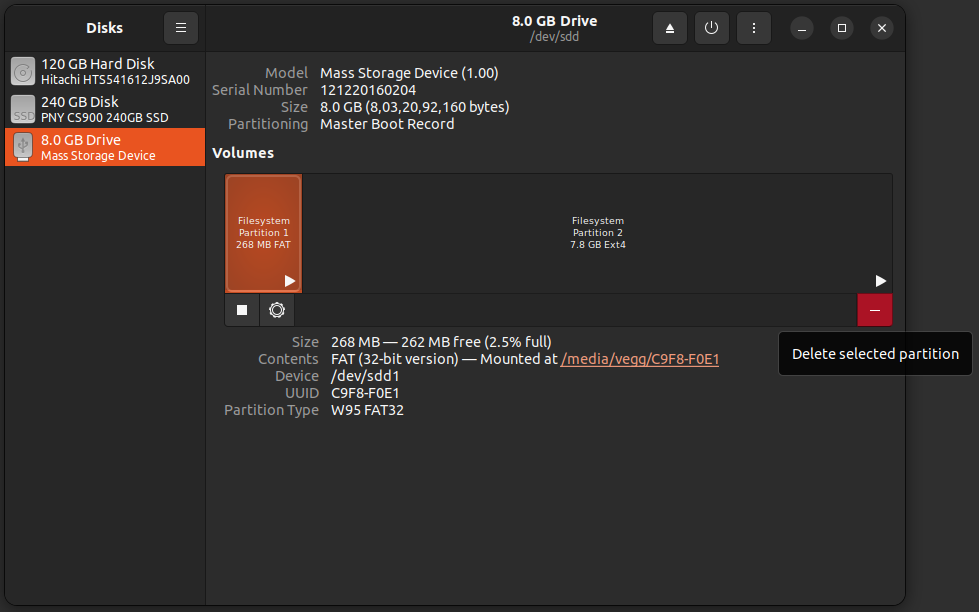
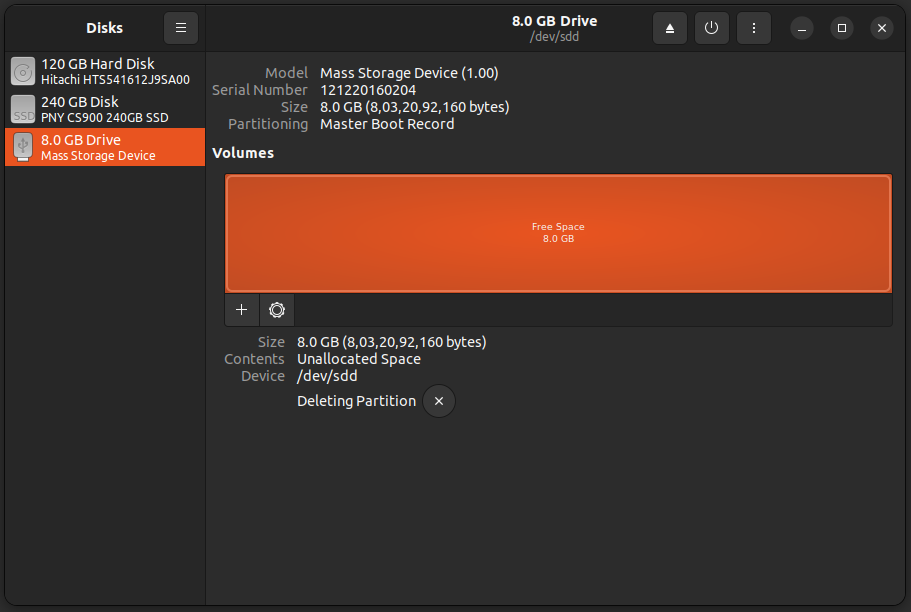
if partition is already present in SD Card then, Click on the Delete selected partition icon and select Delete Partition.
After Deleting All partition we can see something like below.
Click on Next button.
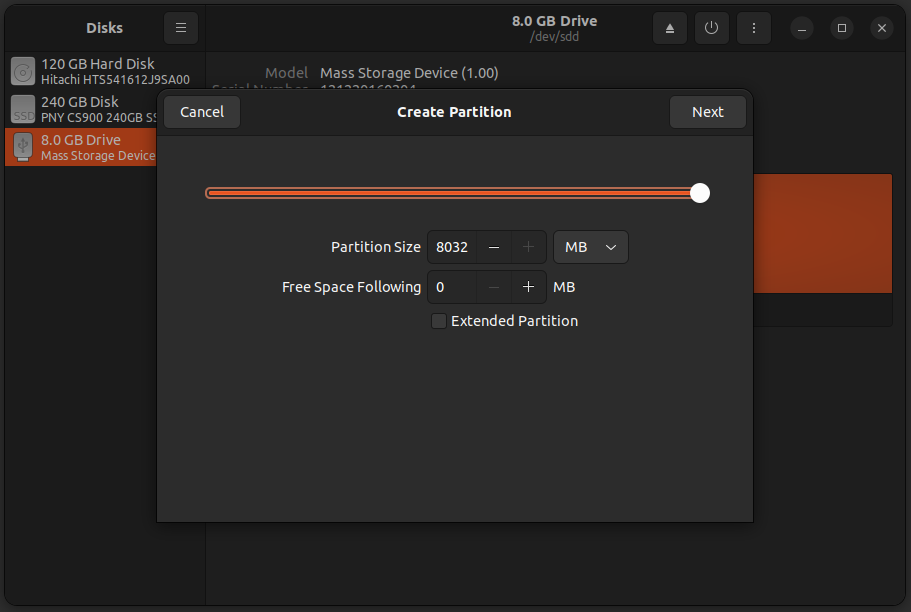
Select the desired file system (e.g., FAT32) and click Create.
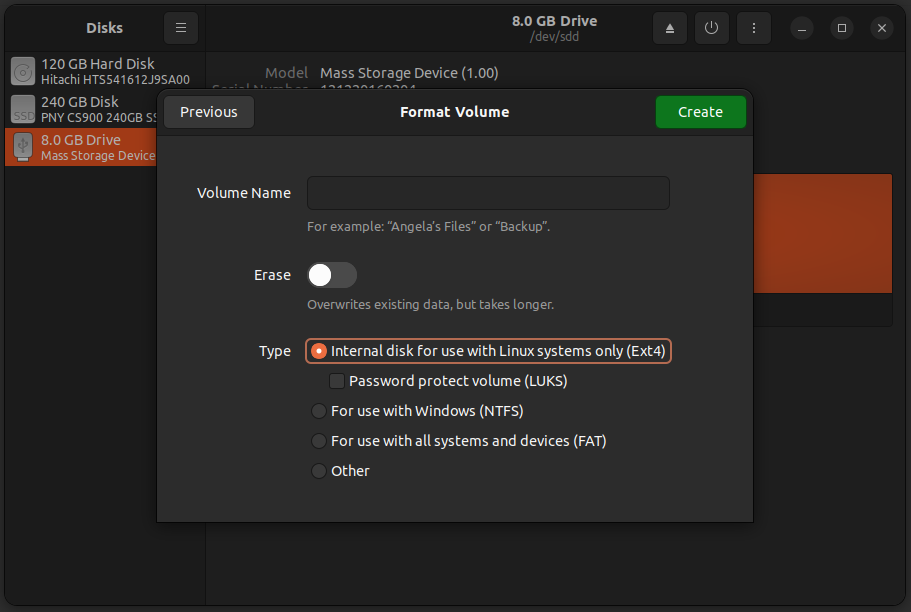
After the successful completion of the process, the SD card is formatted with the selected partition.

Insert the SD-card into your computer. Use USB-to-SD adapter if required.
Open the Disks application if you are using a GUI.
Select the SD-card from the left panel.
Click on the Additional partition options icon and select Format Partition.
Select the desired file system (e.g., FAT32) and click Next.
Click Format to confirm the formatting.
Insert the SD-card into your computer. Use USB-to-SD adapter if required.
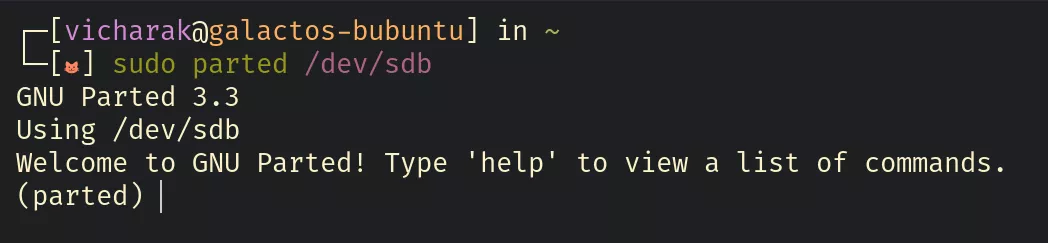
Open the terminal and run the following command to list the available disks:
sudo parted /dev/sdX
Note
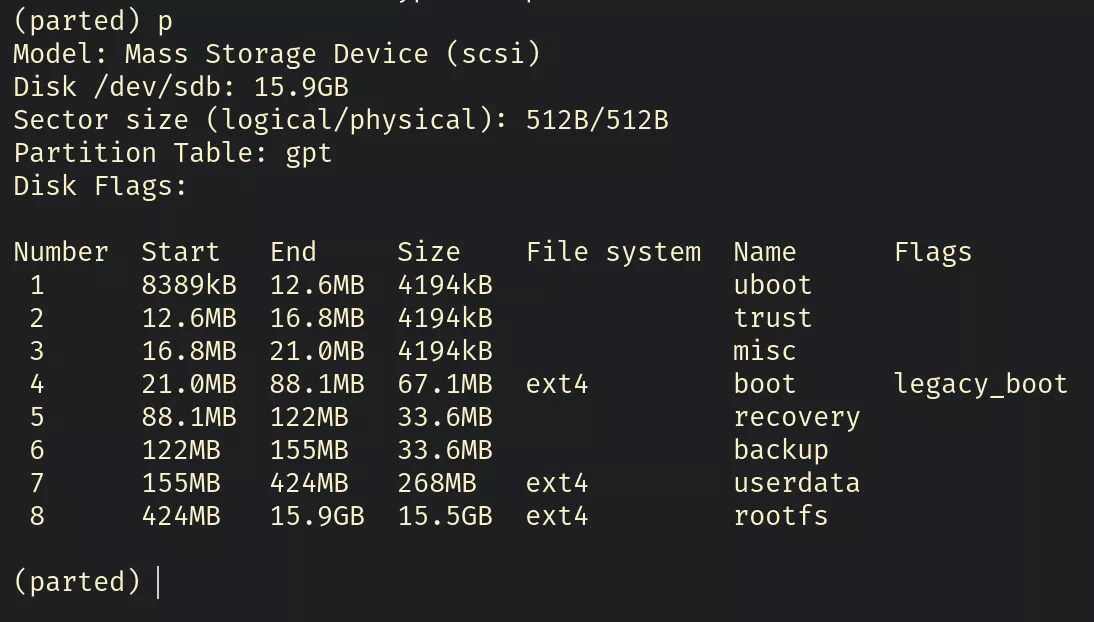
the following command to print the partition table:
(parted) print
Delete the existing partitions using the following command:
(parted) rm 1
(parted) rm 2
...
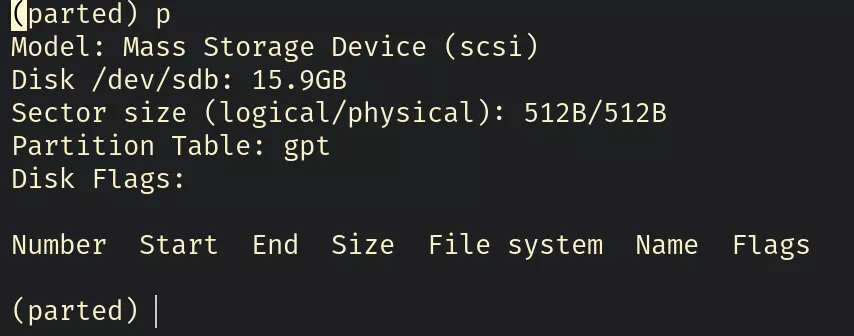
After deleting all the partitions, the partition table should look like this:
Finally, quit the parted tool using the following command:
(parted) quit
Insert the SD-card into your computer.
Open the terminal and run the following command to list the available disks:
sudo fdisk /dev/sdX
Note
Press d to delete the existing partition. Do this for all the partitions.
After deleting all the partitions, the partition table should be empty.
Finally, press w to write the changes to the disk.
Download the bootable image
Obtain the bootable image or operating system files for your desired platform.
Note
Write the image to the SD-card
Warning
You can use any disk imaging tool such as Etcher or Win32 Disk Imager to write the image to the SD-card.
For demonstration purposes, we will use the Balena Etcher tool to write the image to the SD-card.
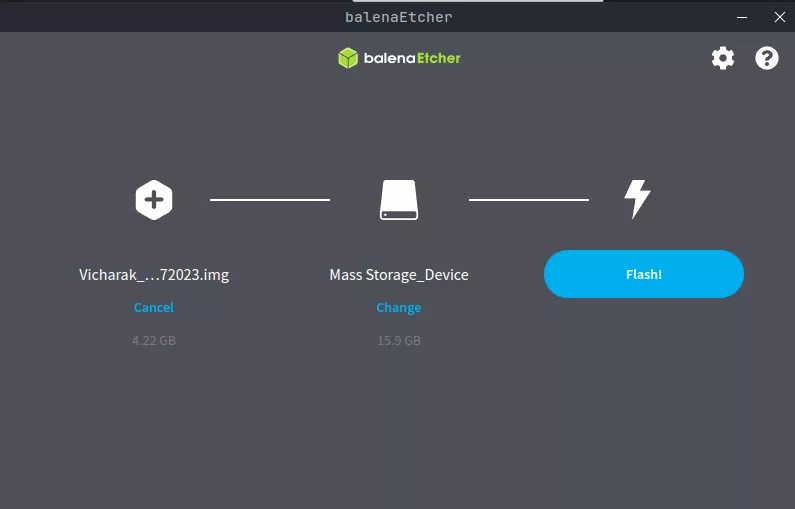
Open the Balena Etcher tool.
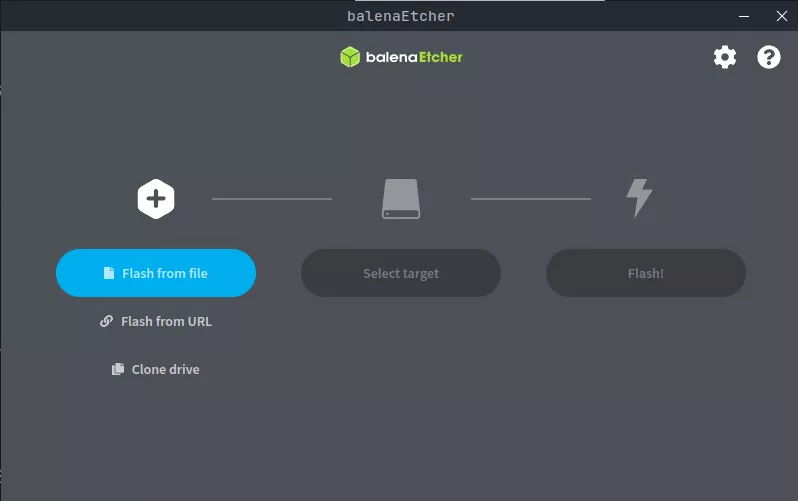
Click on Select Image and select the image file.
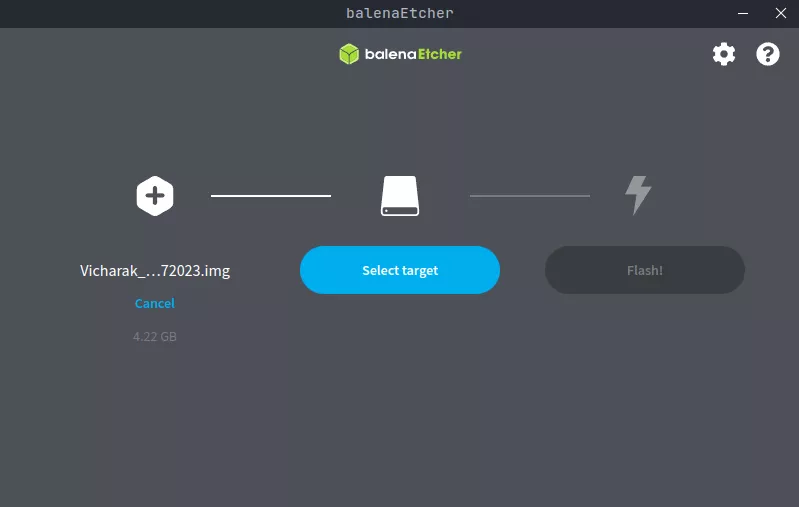
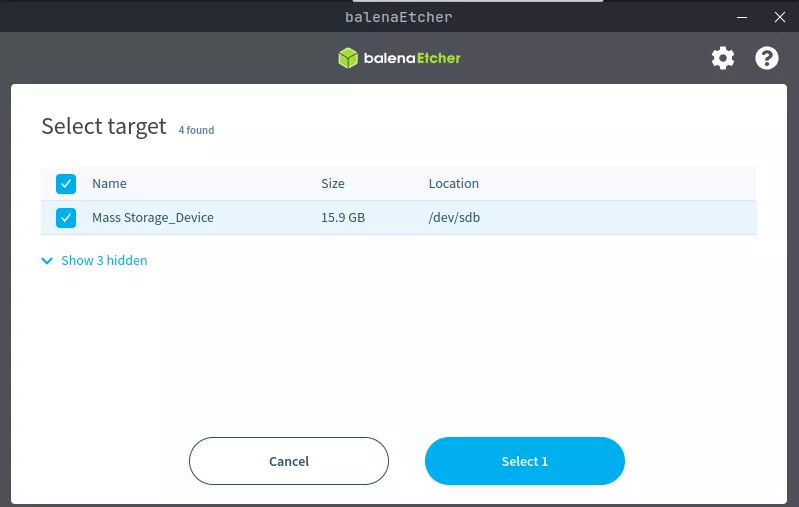
Click on Select Target and select the SD-card.
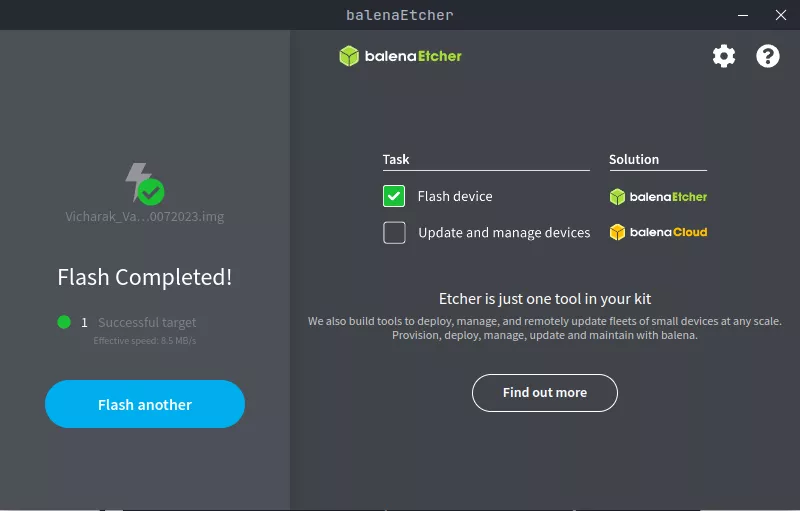
Click on Flash to start writing the image to the SD-card.
Once the writing process is complete, click on Done.
Open the terminal and run the following command to write the image to the SD-card:
sudo dd if=/path/to/image of=/dev/sdX bs=4M status=progress; sync
Note
Wait for the writing process to complete.
Once the writing process is complete, Safely eject the SD-card from your computer.
Boot from the SD-card
After writing the image to the SD-card, follow these steps to boot from the SD-card:
Safely eject the SD-card from your computer.
Insert the SD-card into your Vaaman SBC.

Power-on the device to initiate the boot process from the SD-card.
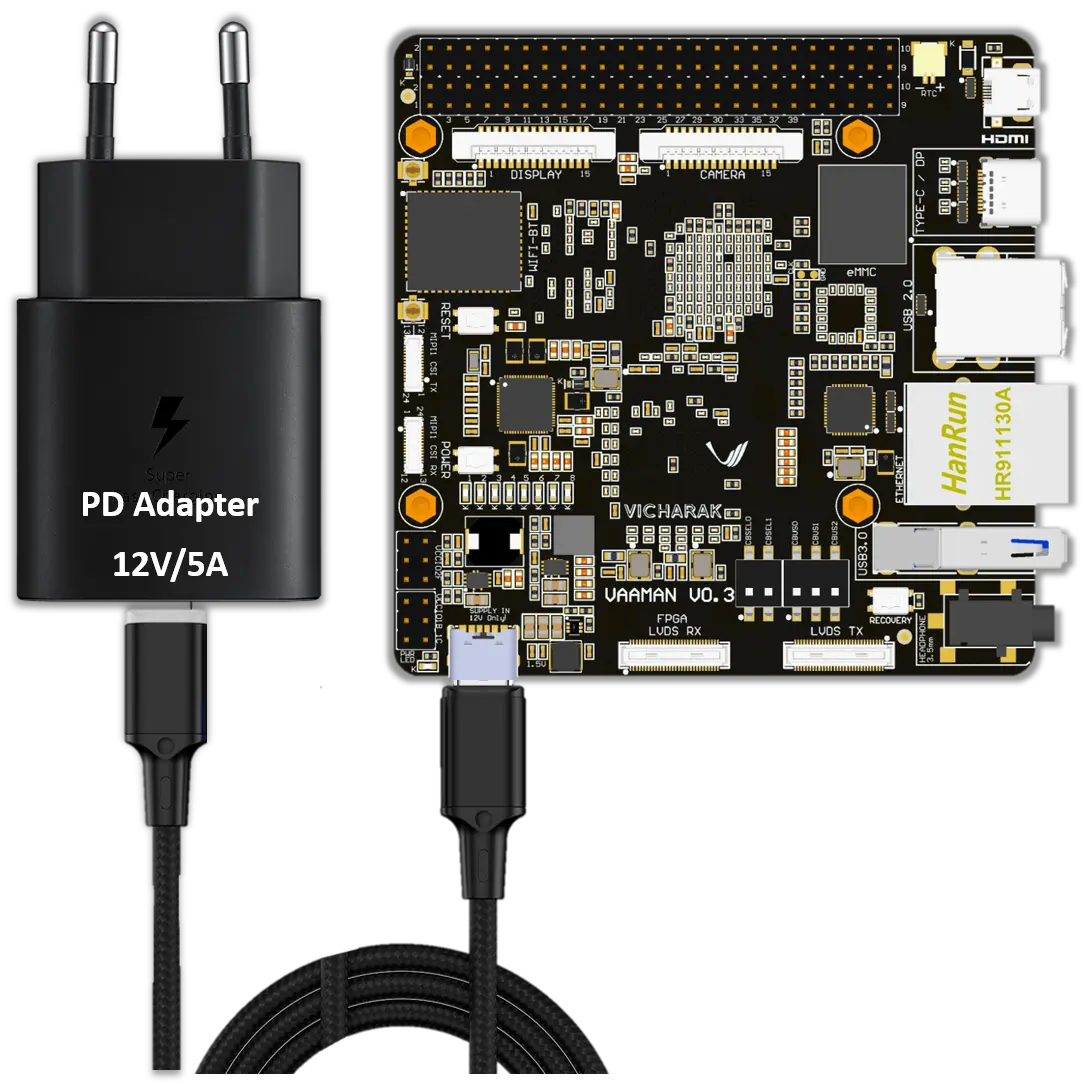
Connect the PD cable to the Vaaman SBC and the PD adapter to the power socket. Once the power is connected, the board will automatically turn on.
Danger
12V Power Input only! Do not use 5V power input.